带有边刃的板底定义了滑雪板的最终形状。在层压后修剪板时,边刃用作引导。板头和板尾垫片用于板头和板尾上的边墙。这些超出了滑雪板的有效边刃的范围。
板底#
从辊上切下一段长度的板底,比所需的长一点。然后,用夹子将这种材料固定到位,并在CNC机床上切出形状。板底切割尺寸比整个滑雪板尺寸小2mm。这允许2mm宽的边刃材料限定板底的最终形状。
在CNC机床上保持板底相当简单。我将板底夹紧,就像我的空白板芯一样:沿着每边的长度夹住几个。机器开始在板头处切割并在一侧向下通过。当它围绕板尾转弯并开始切割第二侧时,我开始用手稳定切割板底。当刀具再次接近板头时,我确保一只手放在板底中间,另一只手靠近切割头。我发现通过这种方式完全保持板底很容易。替代品可能是双面胶带,当然还有一个像样的真空吸尘器,但是因为只是把它压低对我来说效果很好我从未有过足够的动力来尝试别的东西。
板底采用1/4英寸,双刃直刀切割,我们仅保留切割板底和板头/板尾垫片材料。这使其保持锋利,从而在切割的板底上产生更好的光洁度。我使用两种板底之一:ISOSPORT 7500或ISOSPORT ISOHIGHSPEED 2112,两者都是黑色烧结PTEX。ISOHIGHSPEED是一个含有10%石墨的竞赛板底,经过多年的努力,我们一直在测试这两种材料。
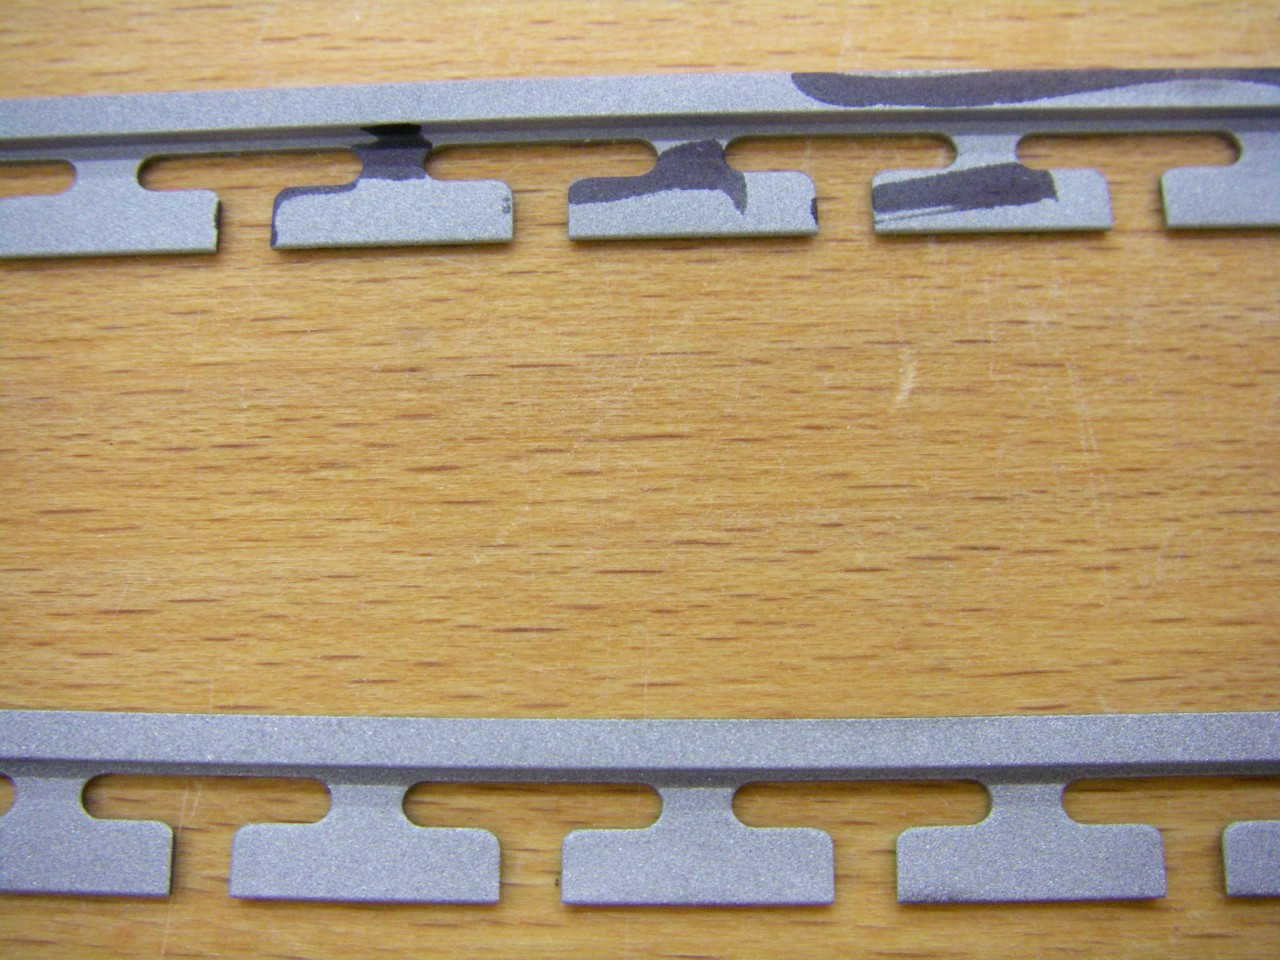
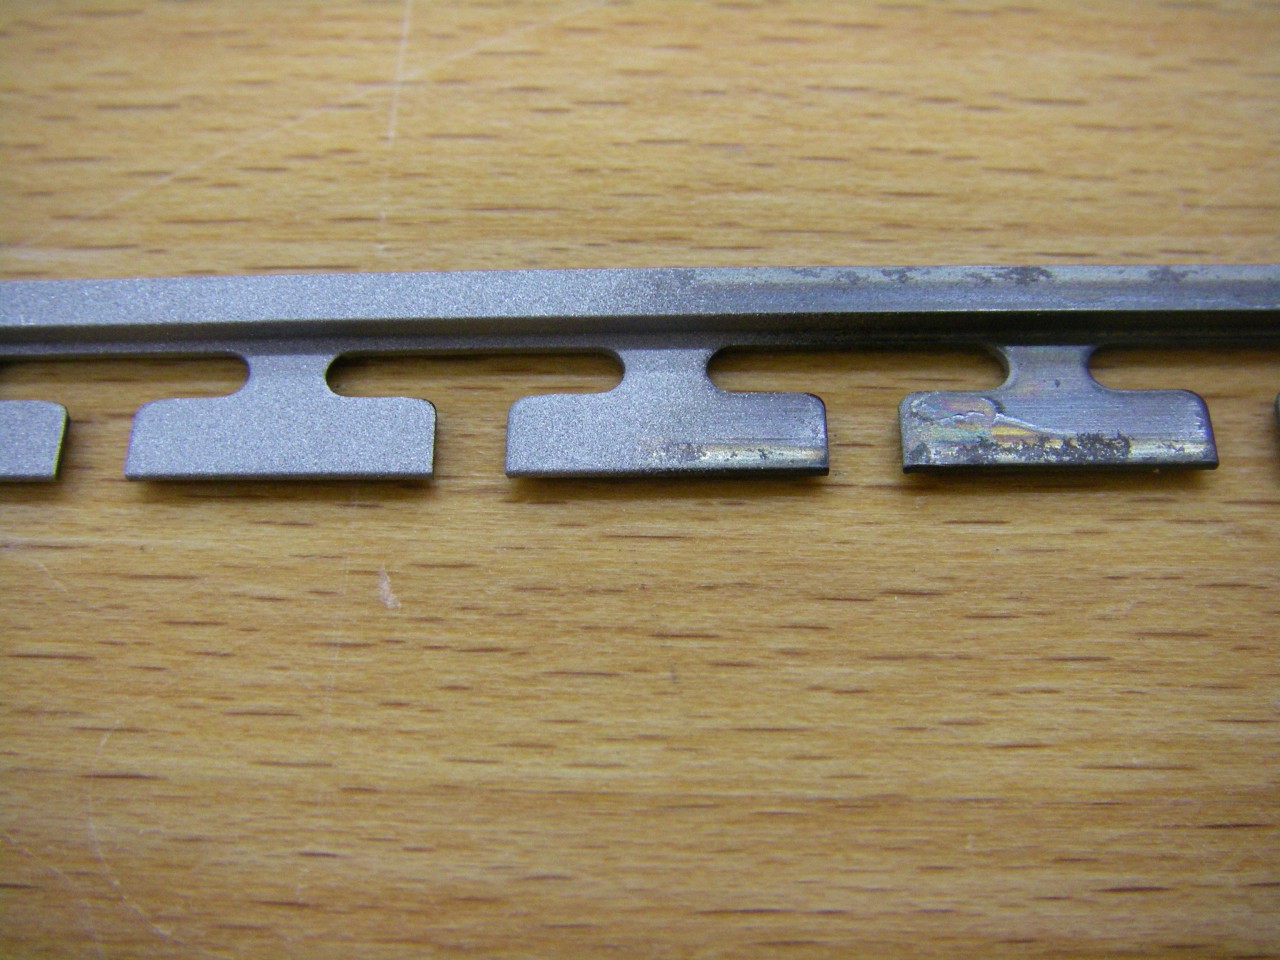
刀具总是在板底边缘留下一点“毛刺”。我从来没有找到一个可以防止这种情况的刀具。我用一块小木块上的320目砂纸去除了毛刺。它可以轻松地磨掉毛刺材料,而不会改变底板的形状。
边刃准备#
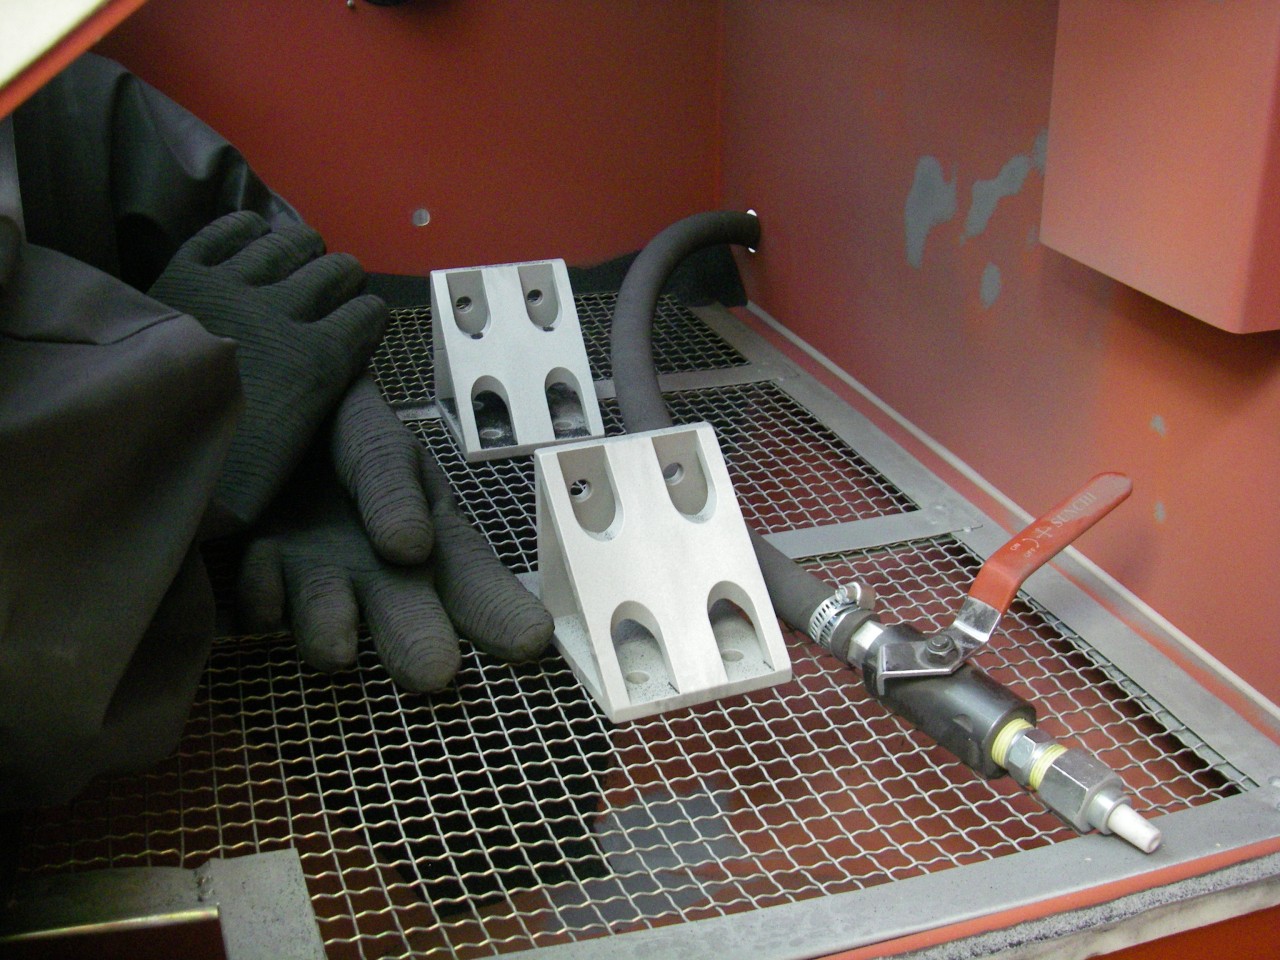
边刃材料由钢制成。它的洛氏硬度为HRC 48,这是行业标准。我有一些预切割成84英寸(约213cm)长度的边刃材料。它在工厂进行喷砂处理以帮助粘接。对于长达185cm的板,这是一个很好的长度,具体取决于板的形状。对于比这更长的板,我从连续的原材料卷材切割边刃材料,这些材料是未加工的,未进行粘合处理。然后,我使用一个小型喷砂机对这些边刃进行喷砂处理,我可以在需要时在我们的商店中进行处理。
我很擅长在边刃材料上做好表面处理。我非常小心地检查两种类型的边缘并标记任何可以使用改进的地方,然后再次通过喷砂机对它们进行任何必要的点修补。在此之后,我只戴着手套操作边刃,以确保我皮肤上的油不会污染边刃表面。
我使用60目的氧化铝喷砂介质。喷射单一长度的边刃材料大约需要10分钟。
边刃喷砂#
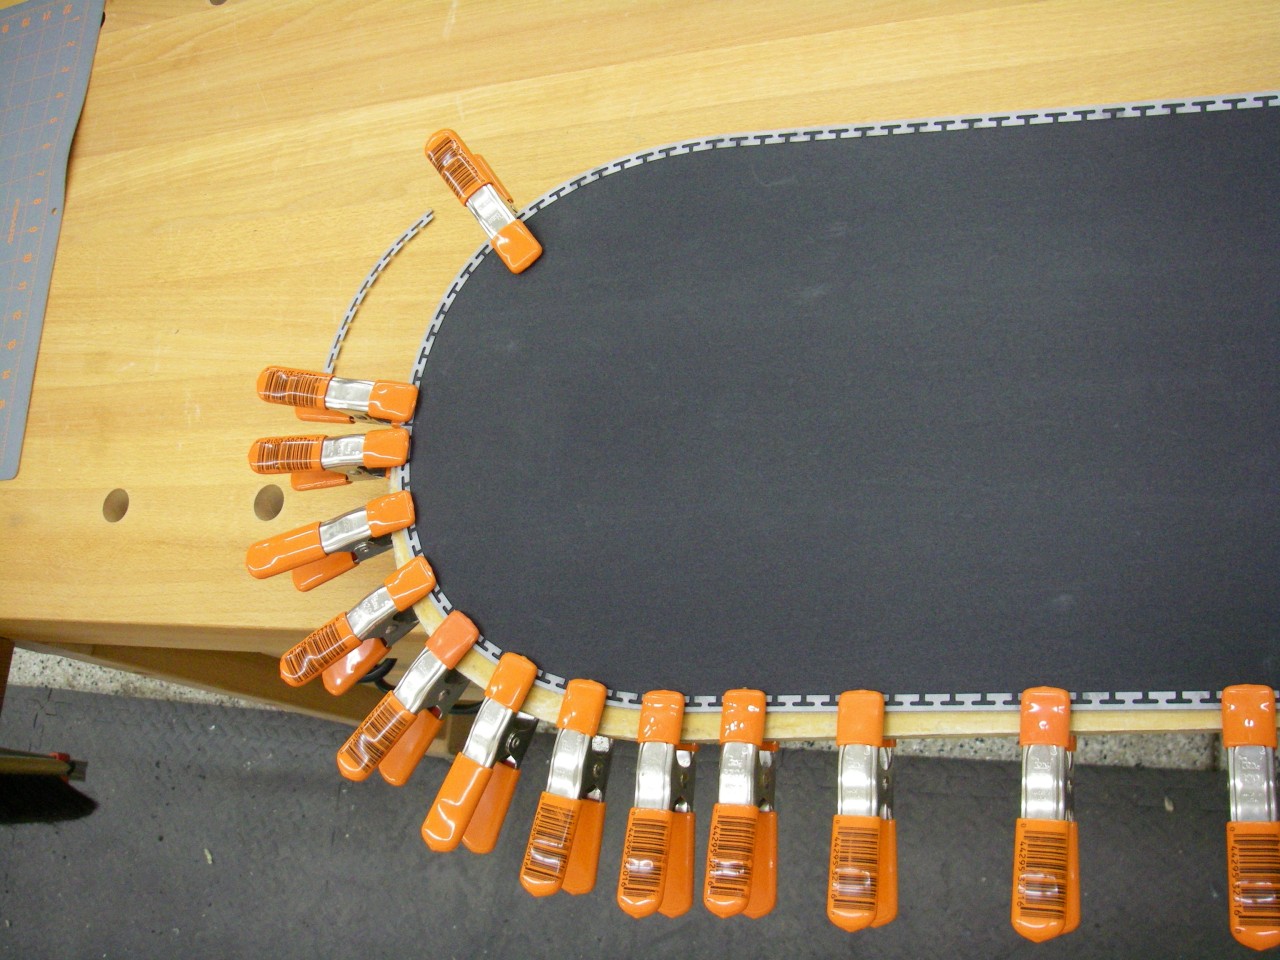
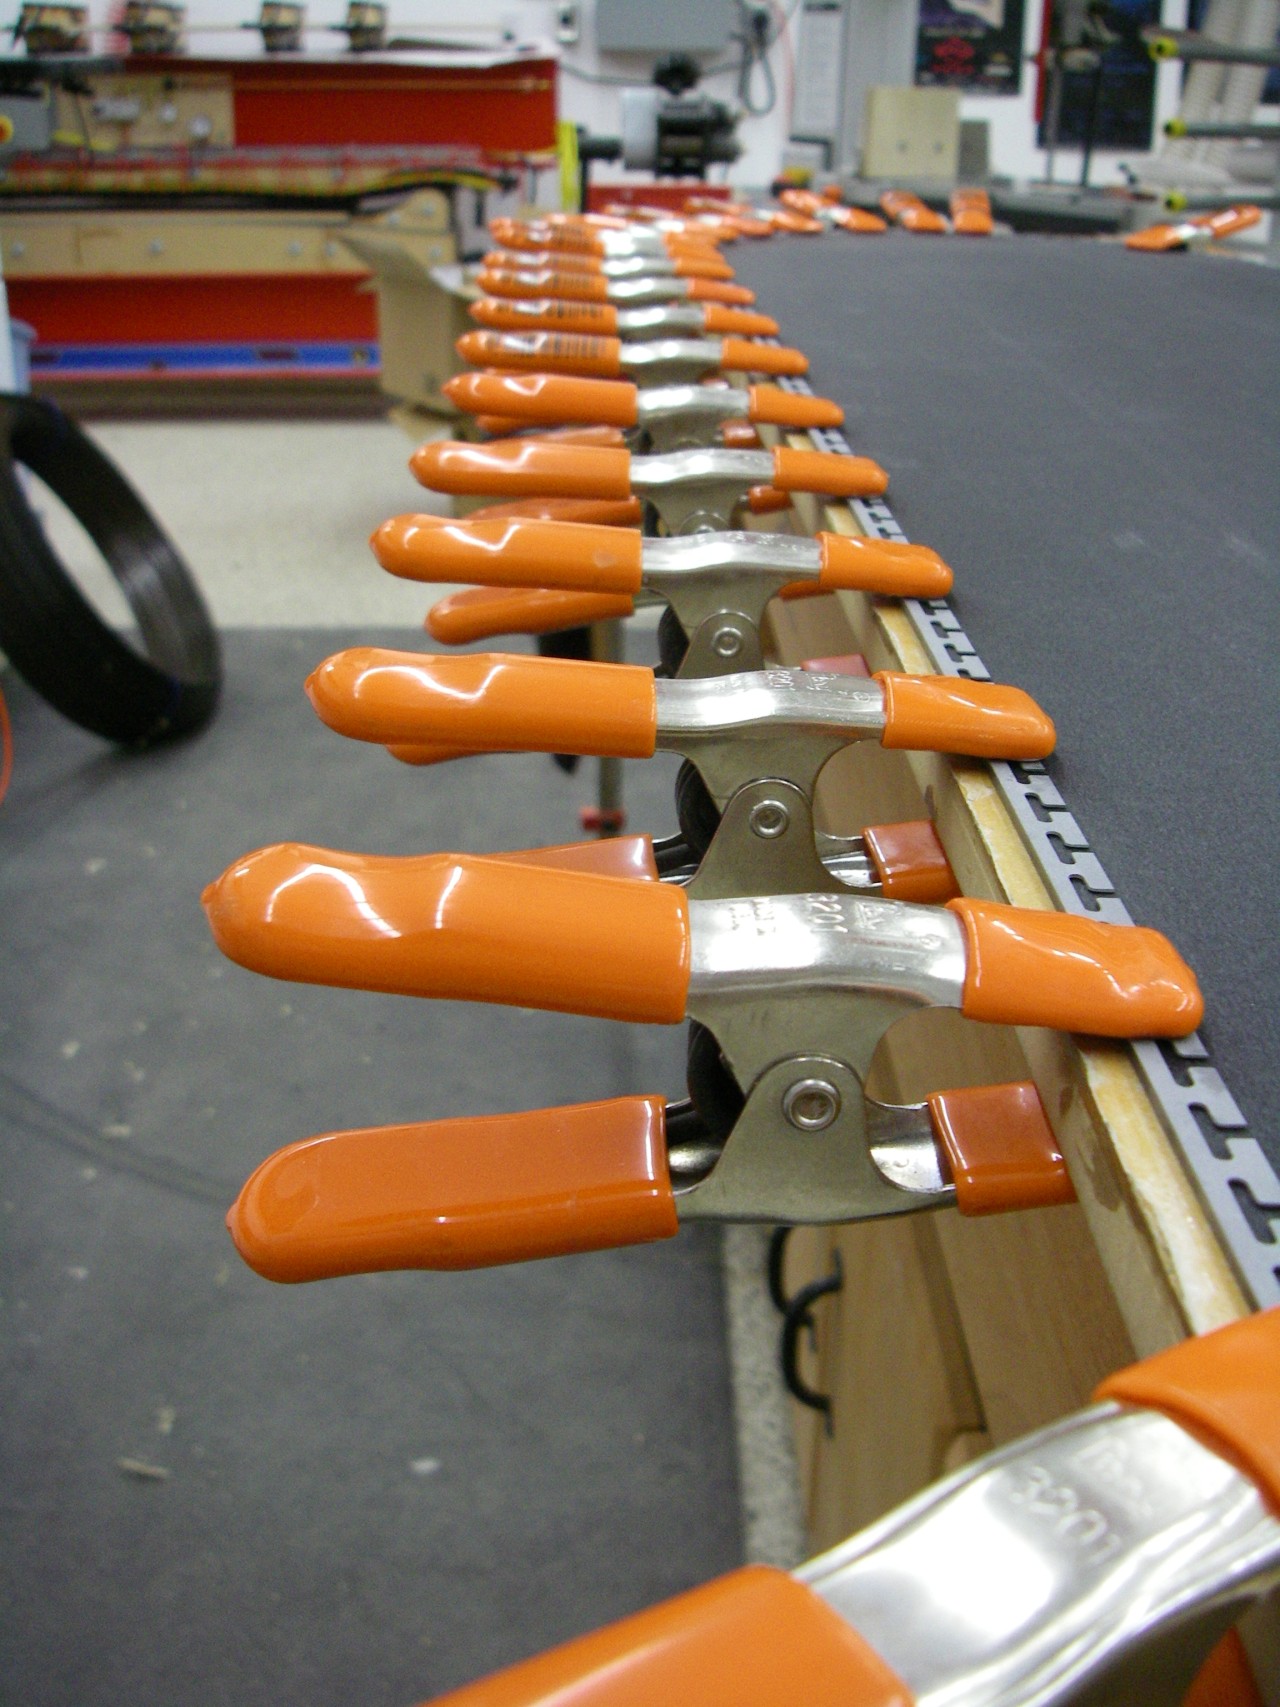
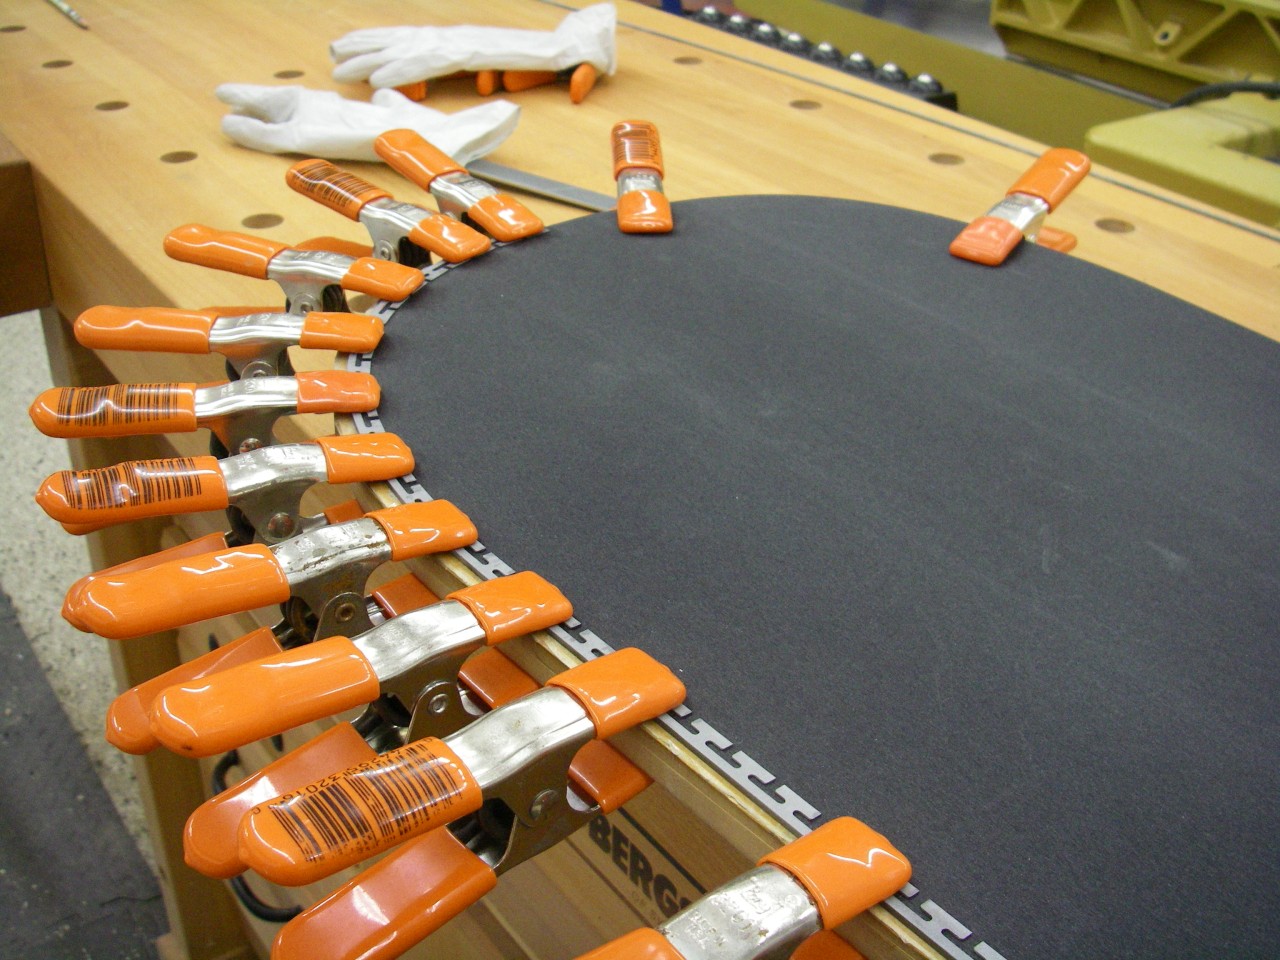
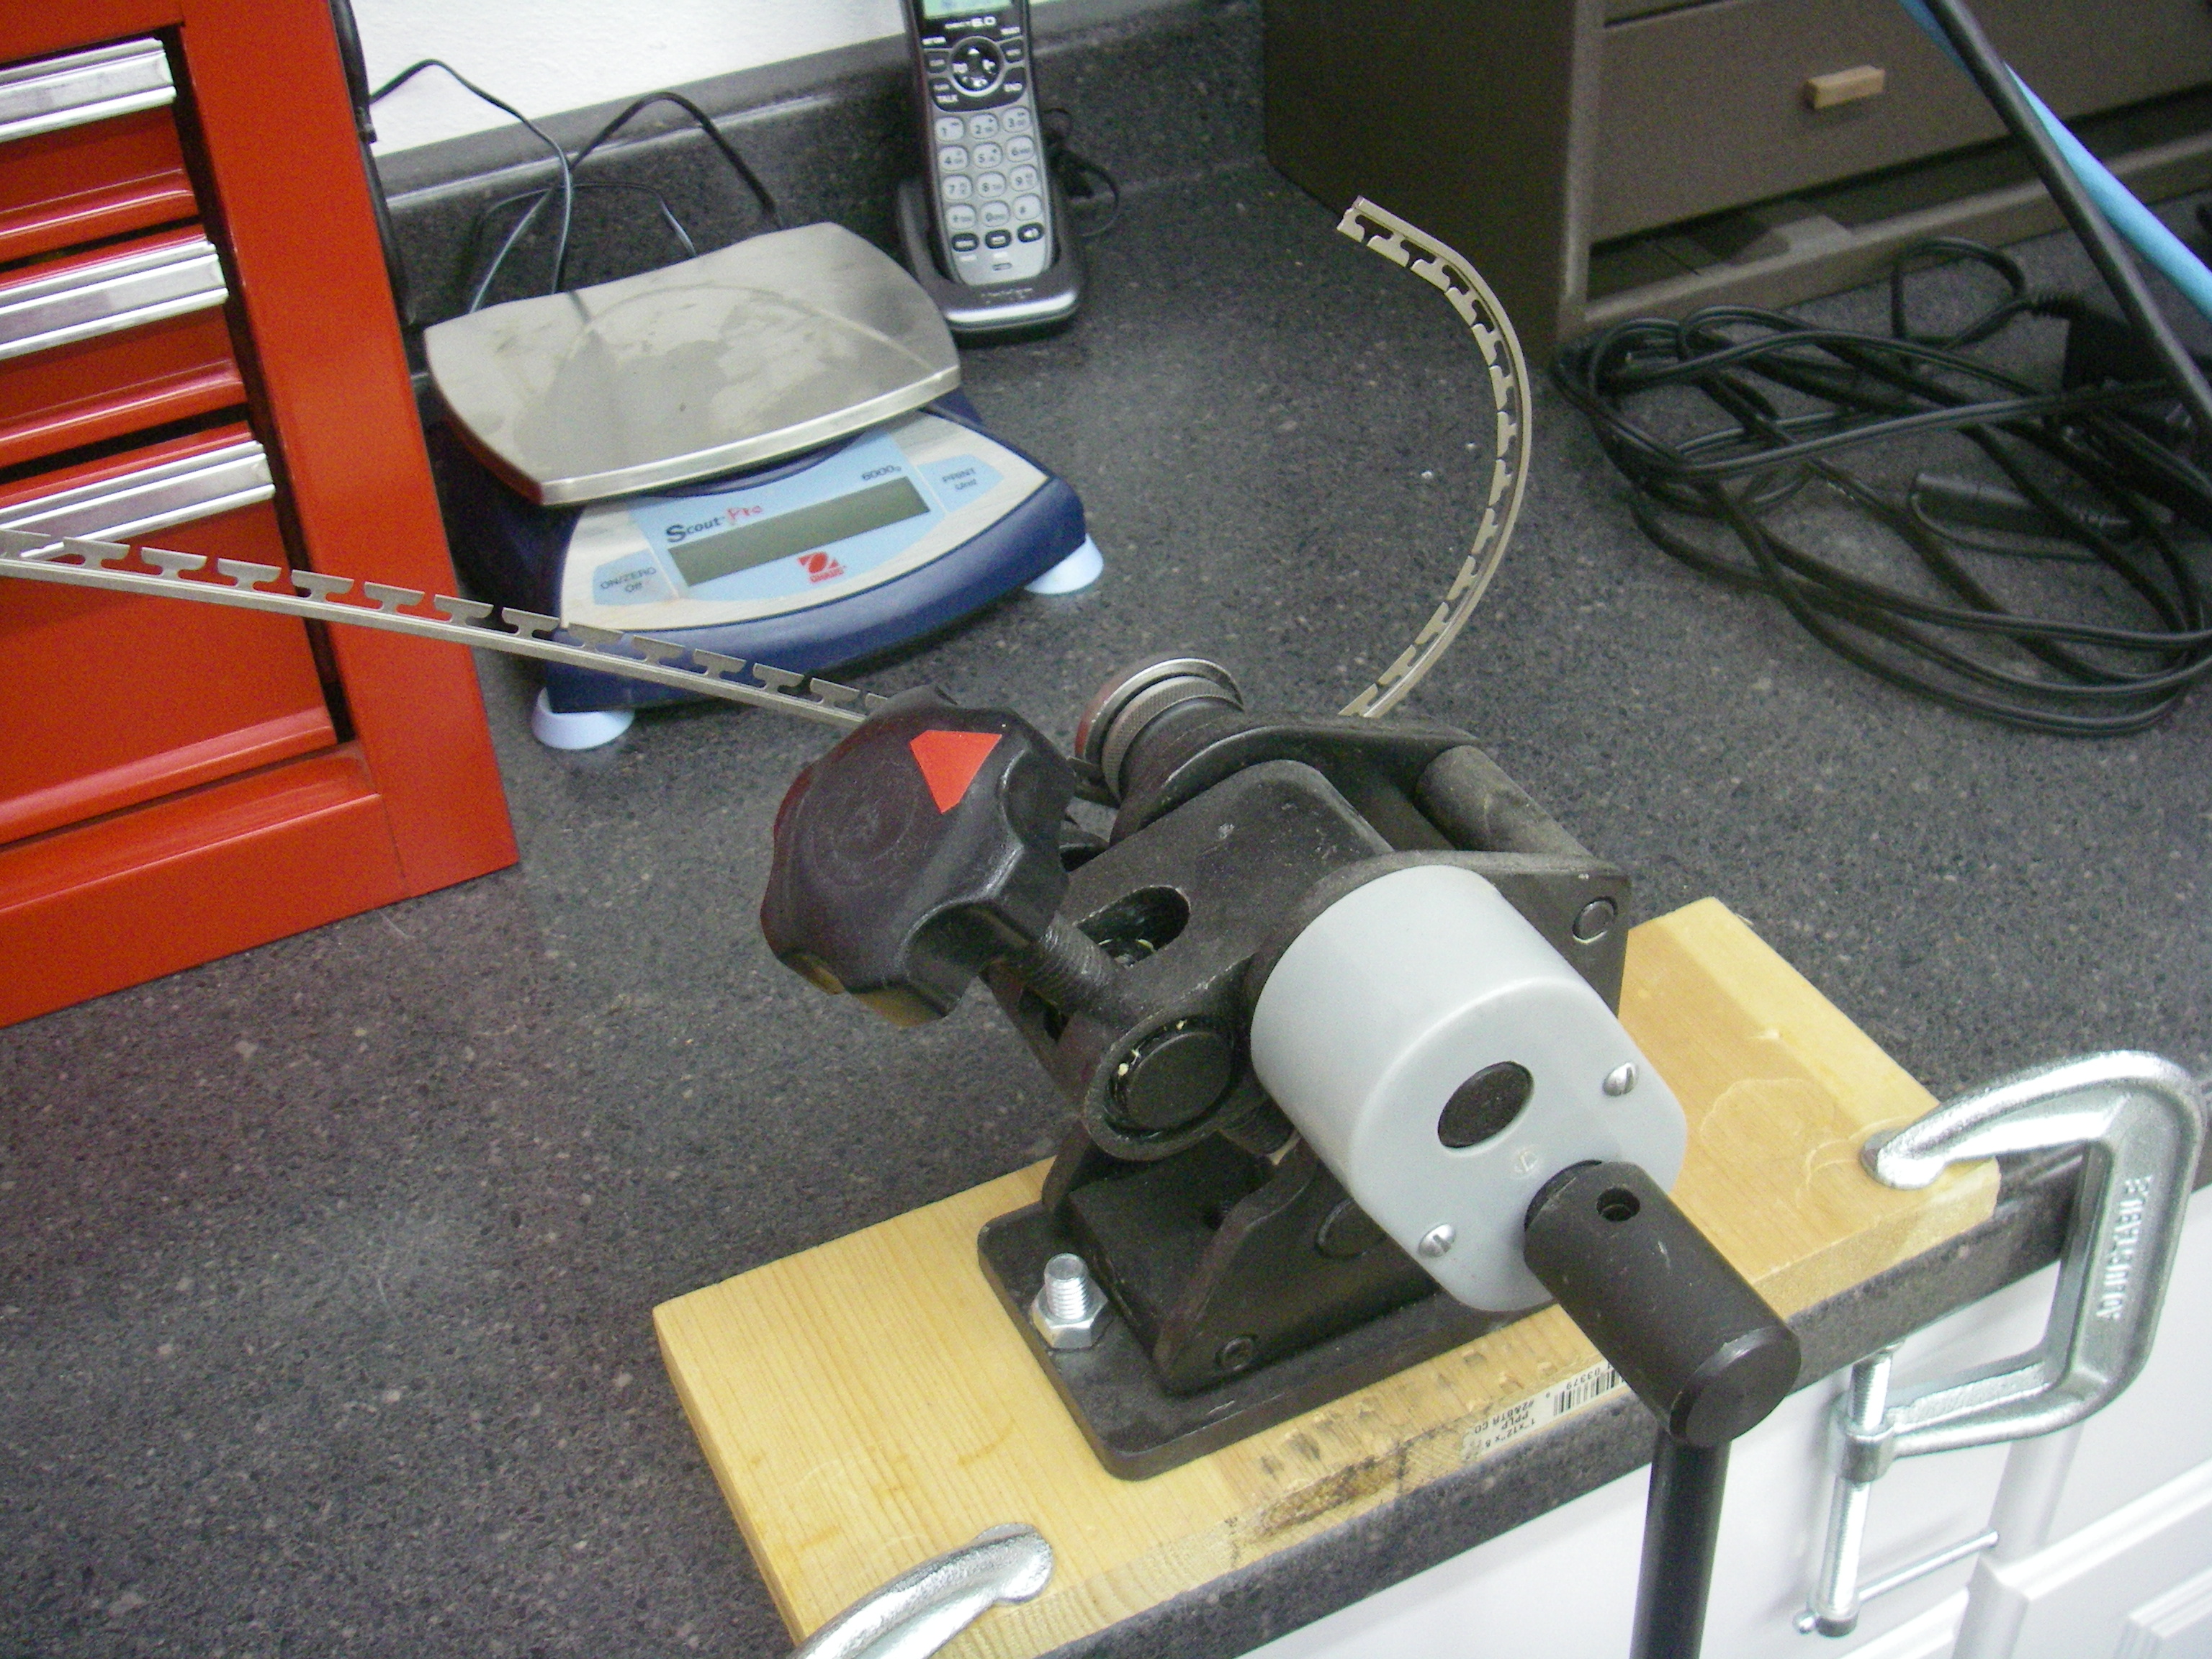
边刃弯曲和固定到板底#
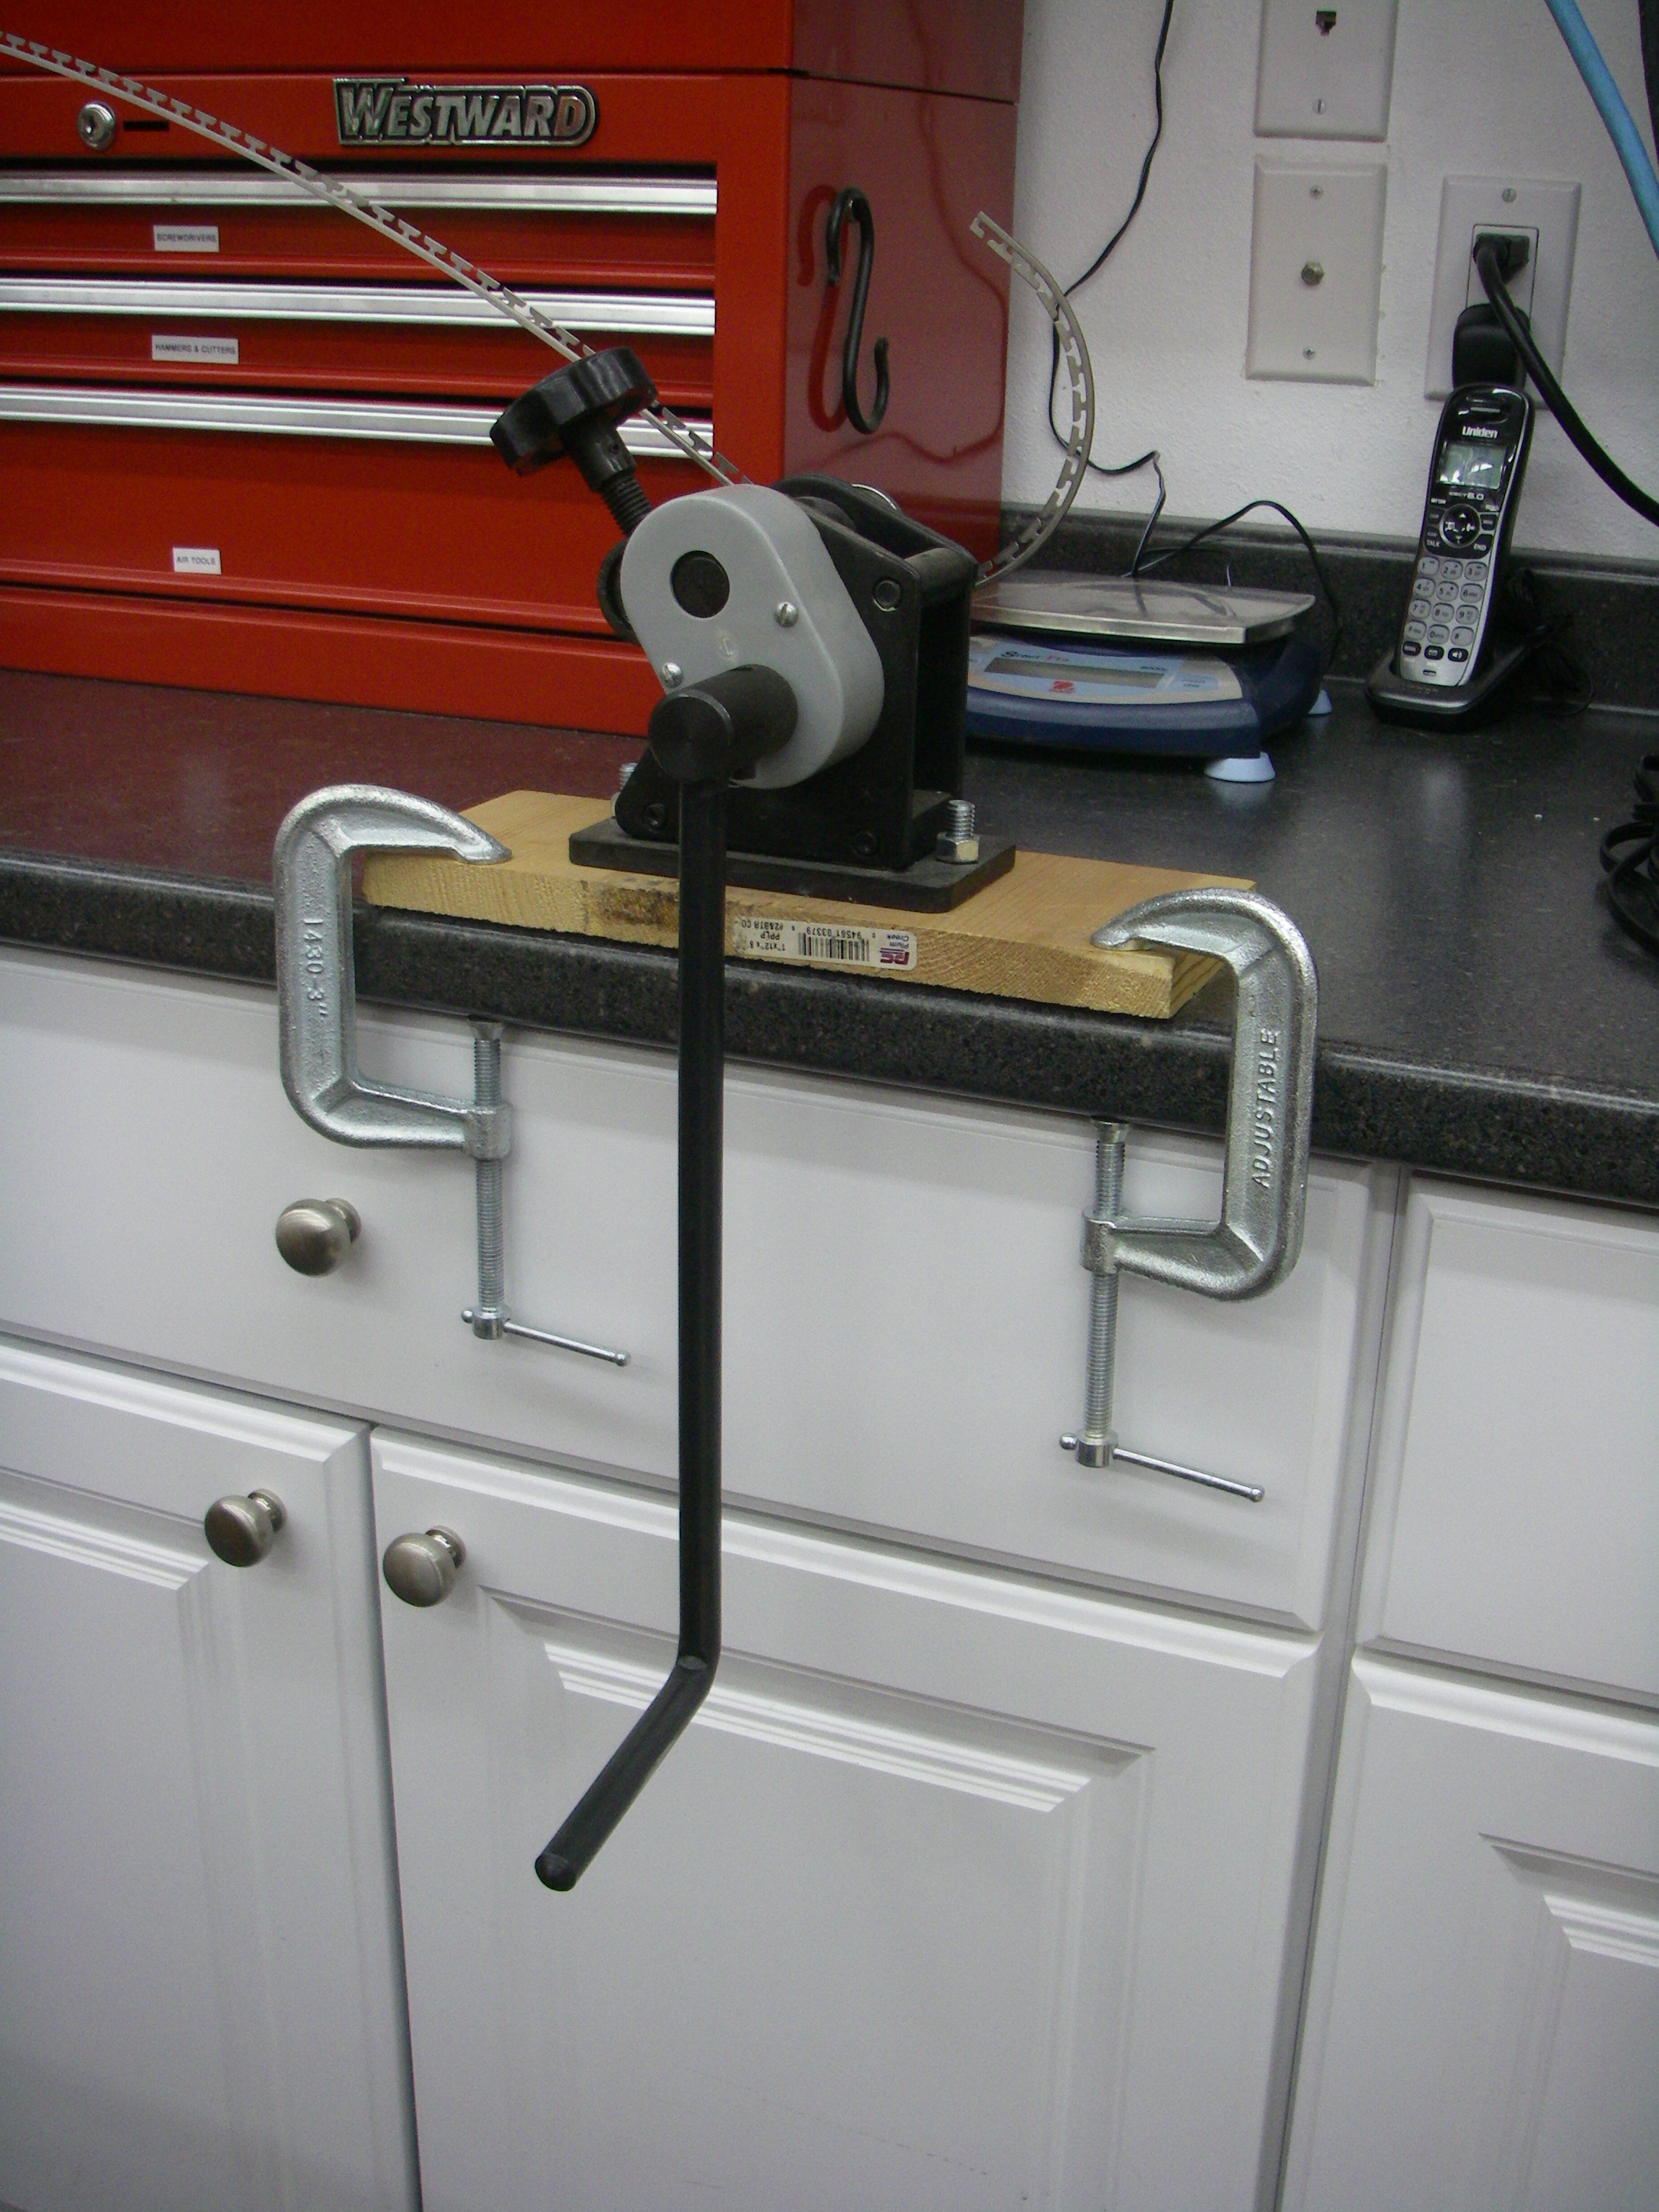
接下来,弯曲边刃以完美匹配板底的形状。我首先通过弯边机折弯边刃的末端,然后用手精练其余的弯曲。这个初始弯曲有很大帮助,我试图使它比实际需要的更紧,因为它似乎更容易放松回到正确的形状。任何超出板中心线的多余边刃都会被修剪掉并归档。一旦边刃完美贴合,我将其夹紧并用氰基丙烯酸酯胶(Super Glue)暂时固定到位。当板层压时,环氧树脂在边刃和板底以及层压板的其余部分之间提供最终粘合。
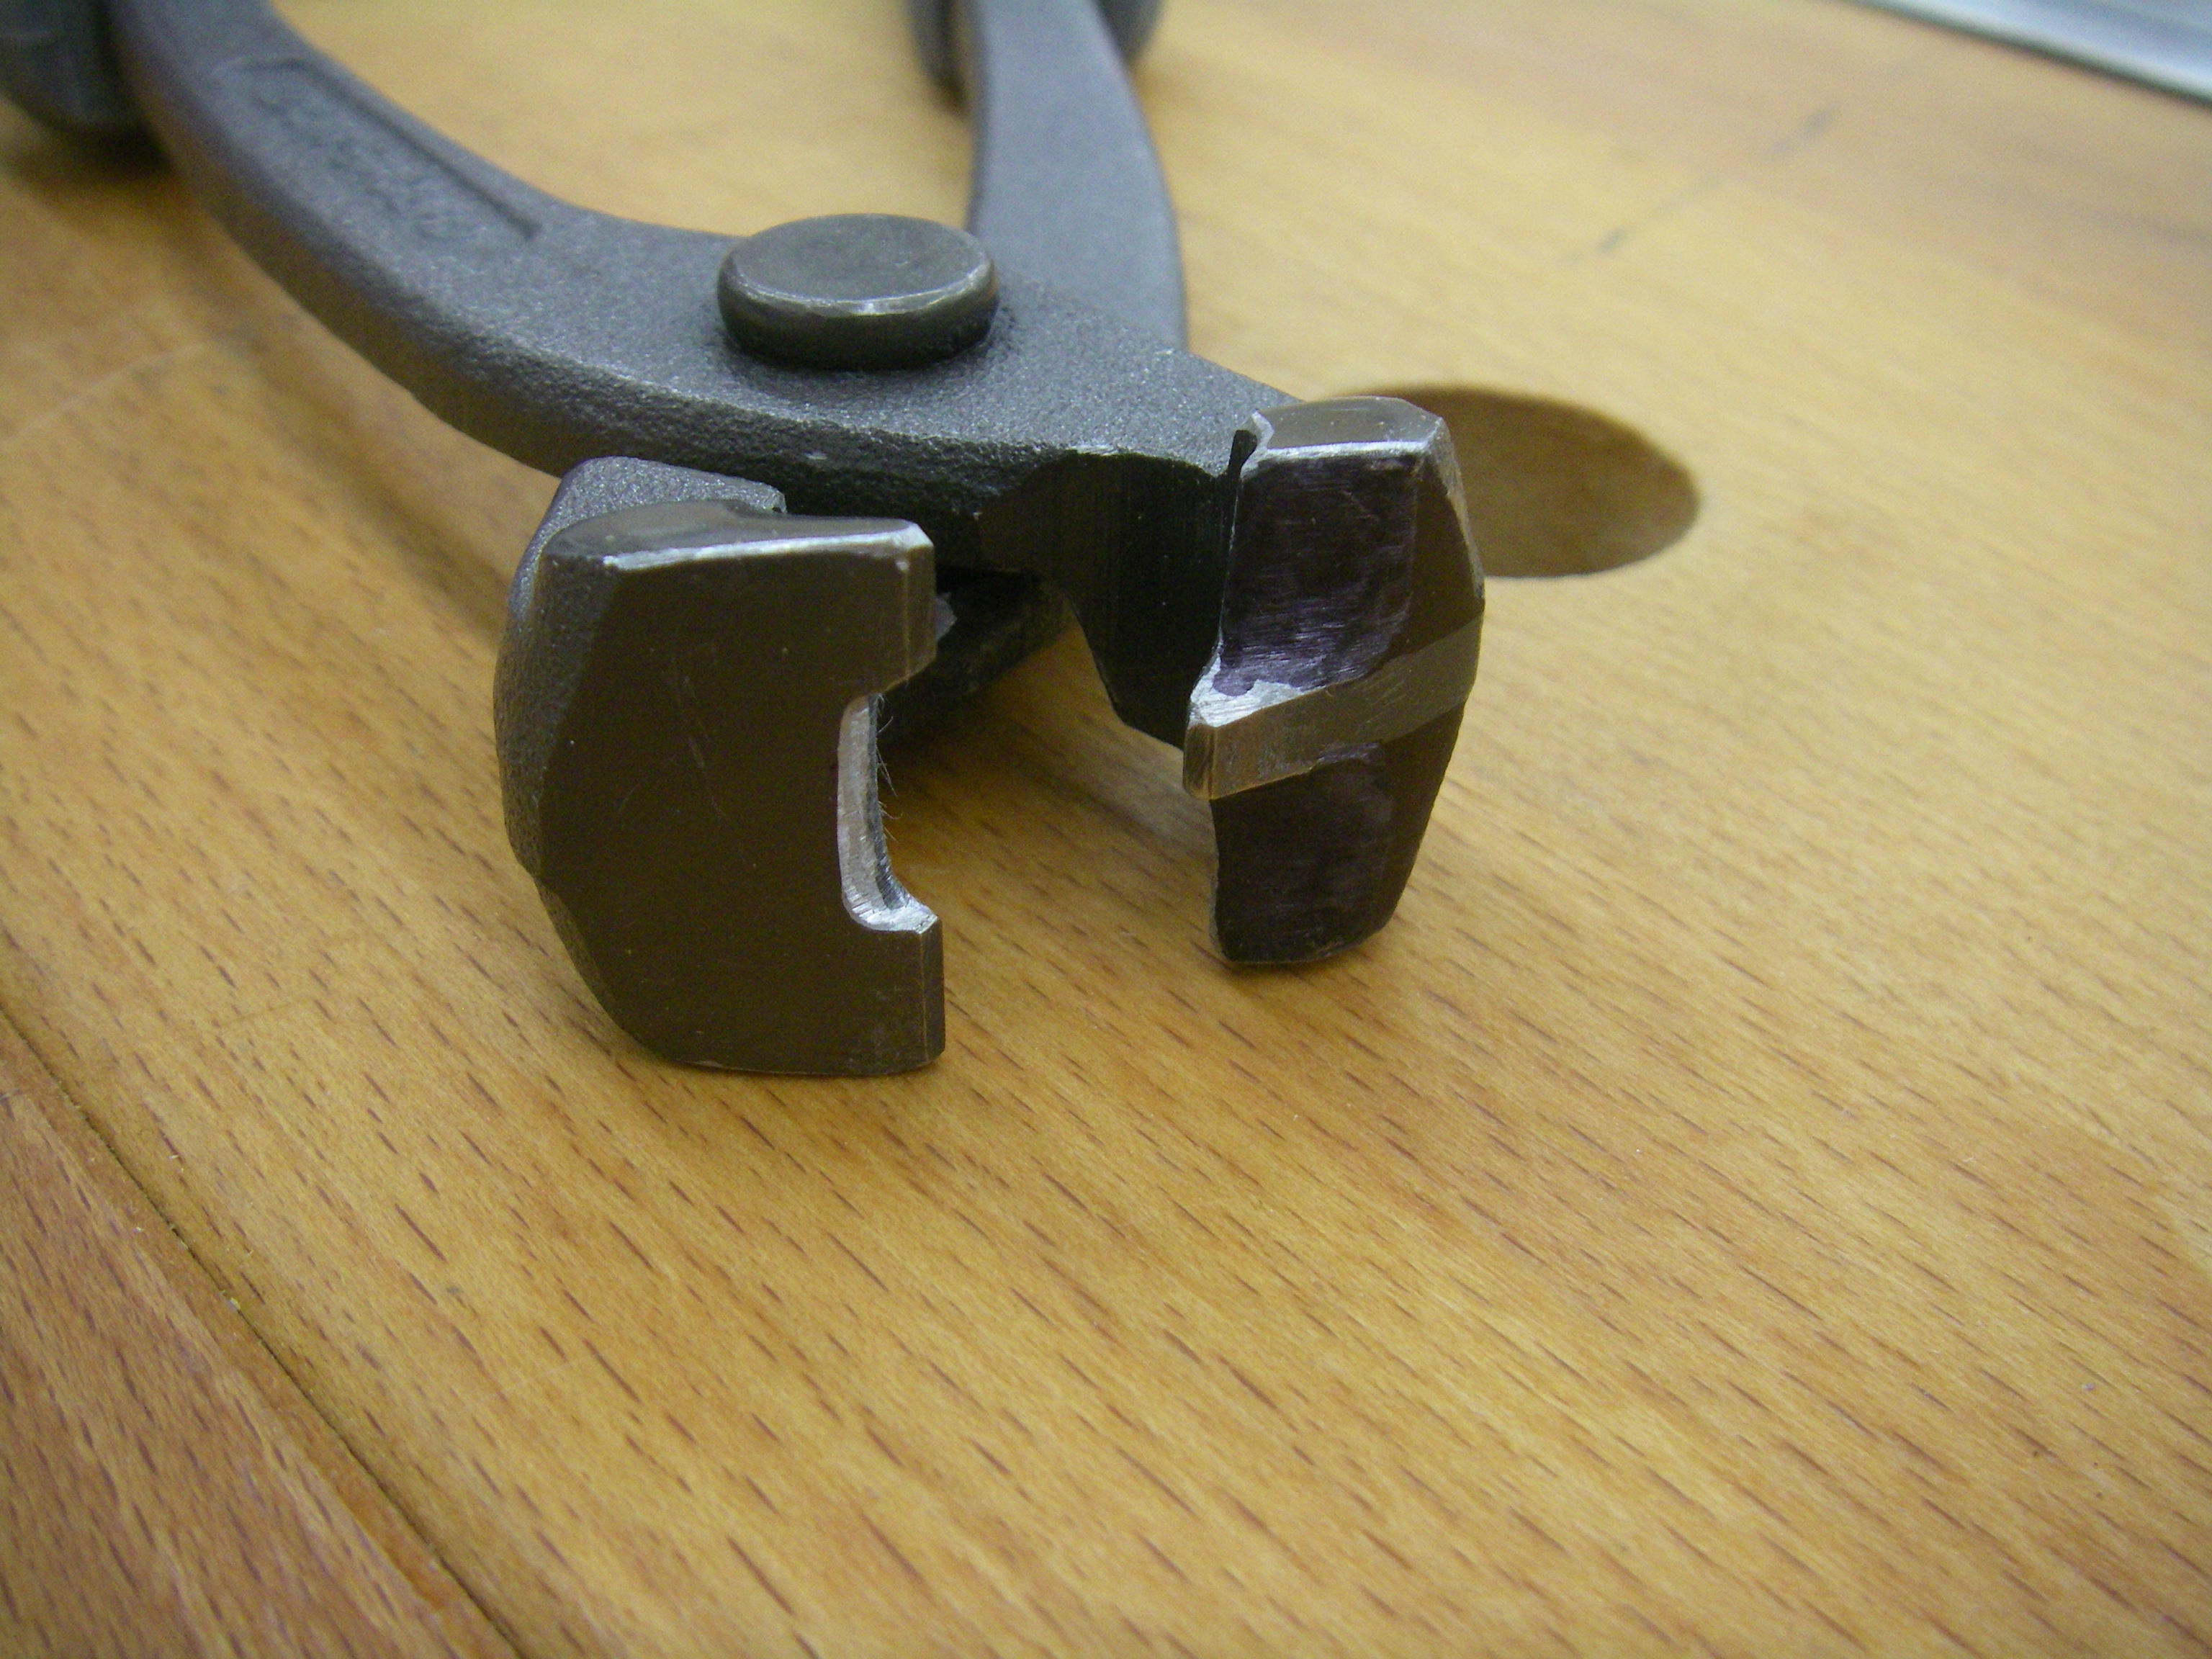
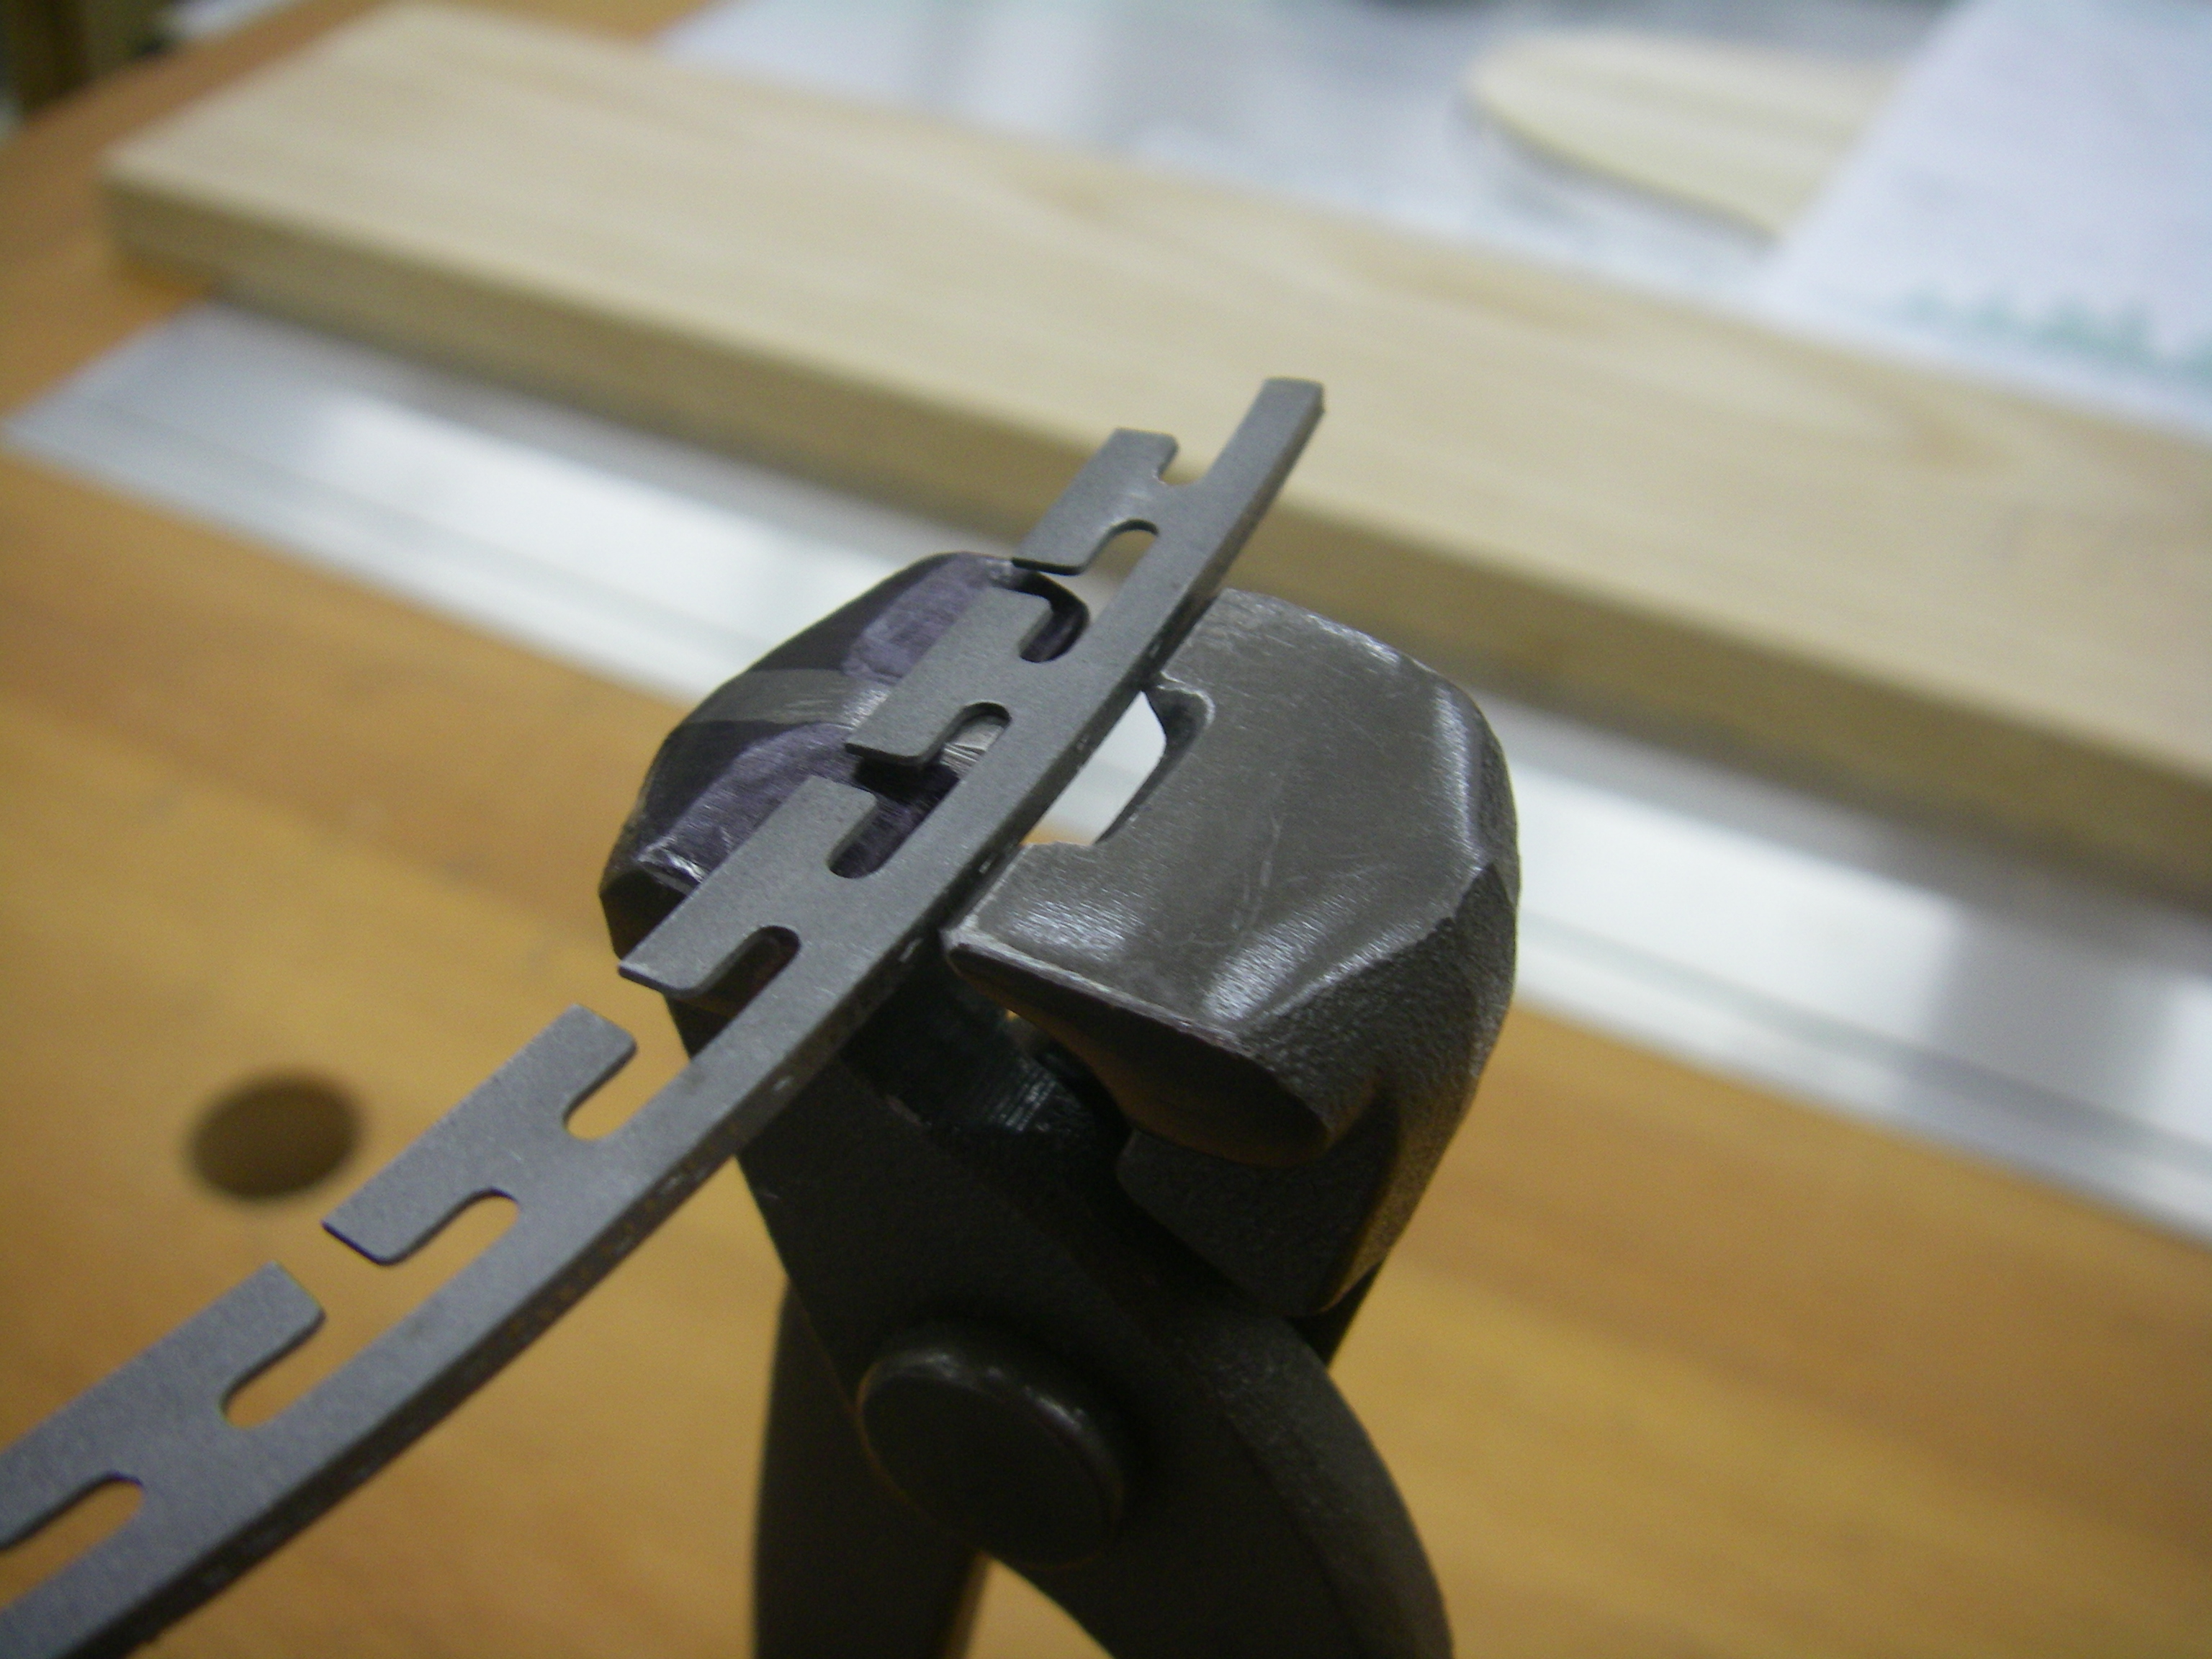
有时它会很快,但通常需要大约2个小时才能完全封边,包括胶水上的干燥时间。如果我需要一个特别紧的弯曲,或者做一个扭结或得到完美的结果我将使用[[Special:MyLanguage/Edge Benders|改装钳]]在我需要的地方施加力。
这是一个将边刃应用于板底的简短视频。它的细节很少,但它会让你了解整个过程。
注意:超级胶水不会像你期望的那样立即粘合。它需要大约20分钟才能干燥并保持边刃,但一旦干燥它就能保持良好状态。
我准备了一个简短的视频,展示了如何将胶水涂在边刃上,我希望会有所帮助。
弯曲边刃#
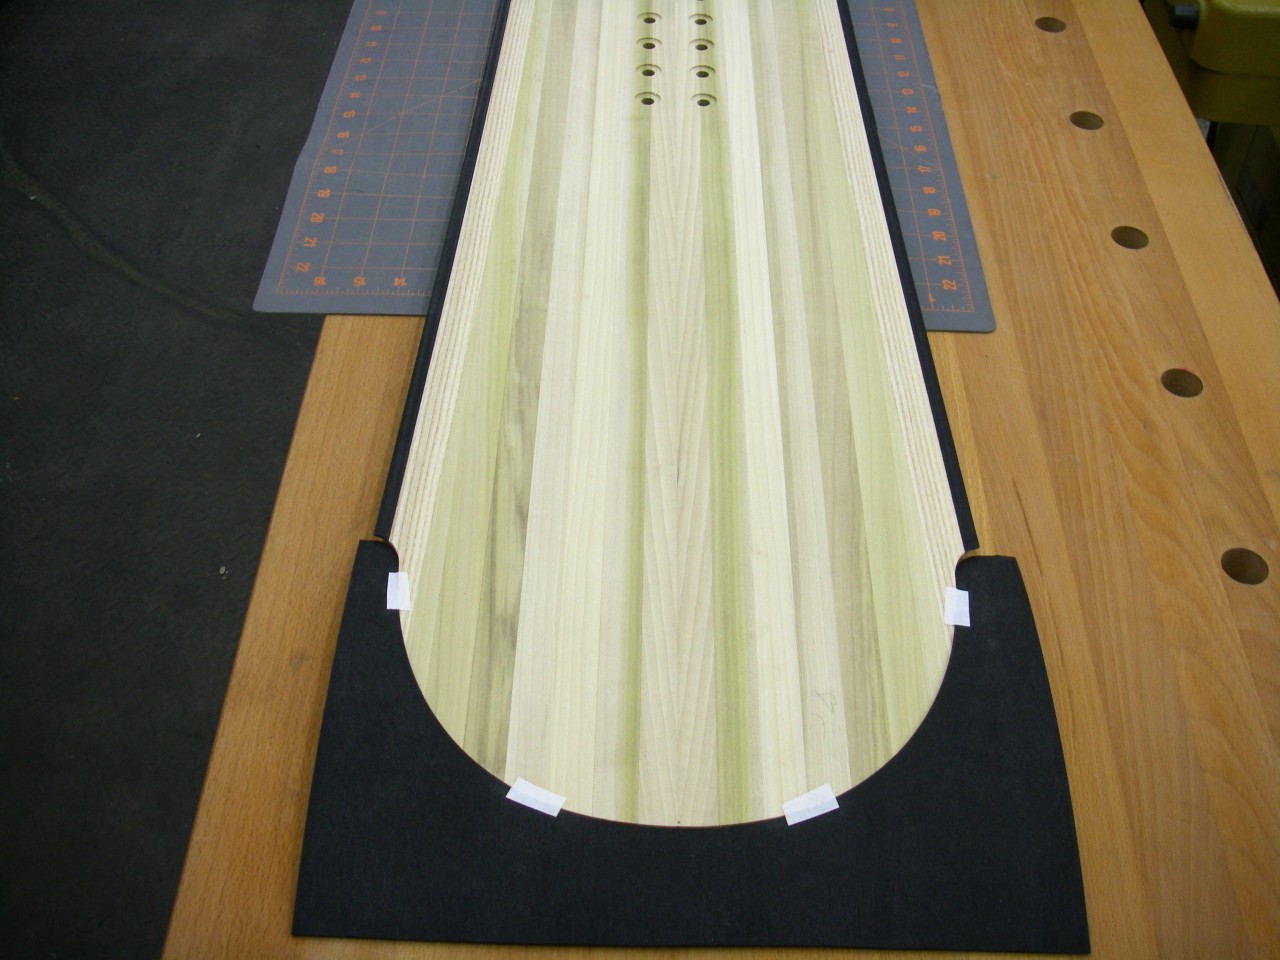
板头和板尾垫片#
我将PTEX用于板头和板尾垫片。沿着板头和板尾的板芯周边需要这种额外的材料。它具有与PTEX边墙类似的用途 - 它可以随着时间的推移保护板芯。这种材料在两面都是滚动,打磨和火焰,准备好粘接。我在CNC机器上将其切割成形状,使其与板芯完美匹配,并用一小块薄纸带暂时将其固定到位。我在PTEX的板头和板尾留出的空间比我们在边墙上的空间多一点,主要是因为那里的板子更薄,并且需要更多的空间。
注意:有些人在使用这样的胶带时遇到了麻烦。胶带确实留在层压板内部,我从来没有遇到过这个问题。然而,有些人使用类似的胶带,并在顶片下面产生小气泡。固定这些部件的替代方案包括在层压板外面的钉书钉,使用轻质玻璃编织层叠它们的额外步骤等。