Raw Notes #
This is a temporary page containing raw, unedited notes on this subject. This page and the information here is incomplete, and may be inaccurate.
Molds
- The purpose of molds: imparting the camber, nose/tail kick, rocker, etc. “How it looks from the side.”
- Molds for pneumatic vs vacuum.
- Adjustable molds.
- MDF vs other materials. Short answer: use MDF.
- Relaxation in the laminate after removal and the need to increase heights in your molds.
- The need for a skin to smooth out the mold.
- Where heating goes in relation to the laminate.
Cassettes and skins
- Difference between a real cassette and a “mold skin.” I feel like I need a better term than “mold skin”, but it’s stuck in my head.
- A cassette is something that holds the base and edges in place on the bottom via a cavity machined into a block of aluminum, or perhaps a multi-layer aluminum stack. It’s designed for a single shape, so you end up with one cassette per shape. Some may also impart the camber/rocker/nose/tail shapes, and thus be rather thick and flat on the bottom, meaning you wouldn’t actually need a mold. The advantage is that it aligns everything perfectly, and you don’t even need to pre-attach your edges. The top could be flat, or could be a more complex shape to allow you to do capped sidewalls or impart other 3d shapes onto the top.
- A mold skin is a flat piece of aluminum, perhaps with some guide blocks tacked to it in various places for alignment. These are usually not specific to a board shape and can be reused for multiple shapes, within reason. (Usually for boards of similar lengths due to deformation in the mold.) The top is also usually just a flat piece of aluminum. Thus the bottom and top of the board are flat. All nose/tail/camber/rocker heights come from the mold. This is very versatile and simple to use/reuse. This is all I’ve ever used myself.
- Material for mold skins.
- Alignment of parts using mold skins.
- Alignment of mold skins to the mold on insertion, and options for this.
- Closing mold skins to keep them together for insertion.
- Cleaning and reusing mold skins.
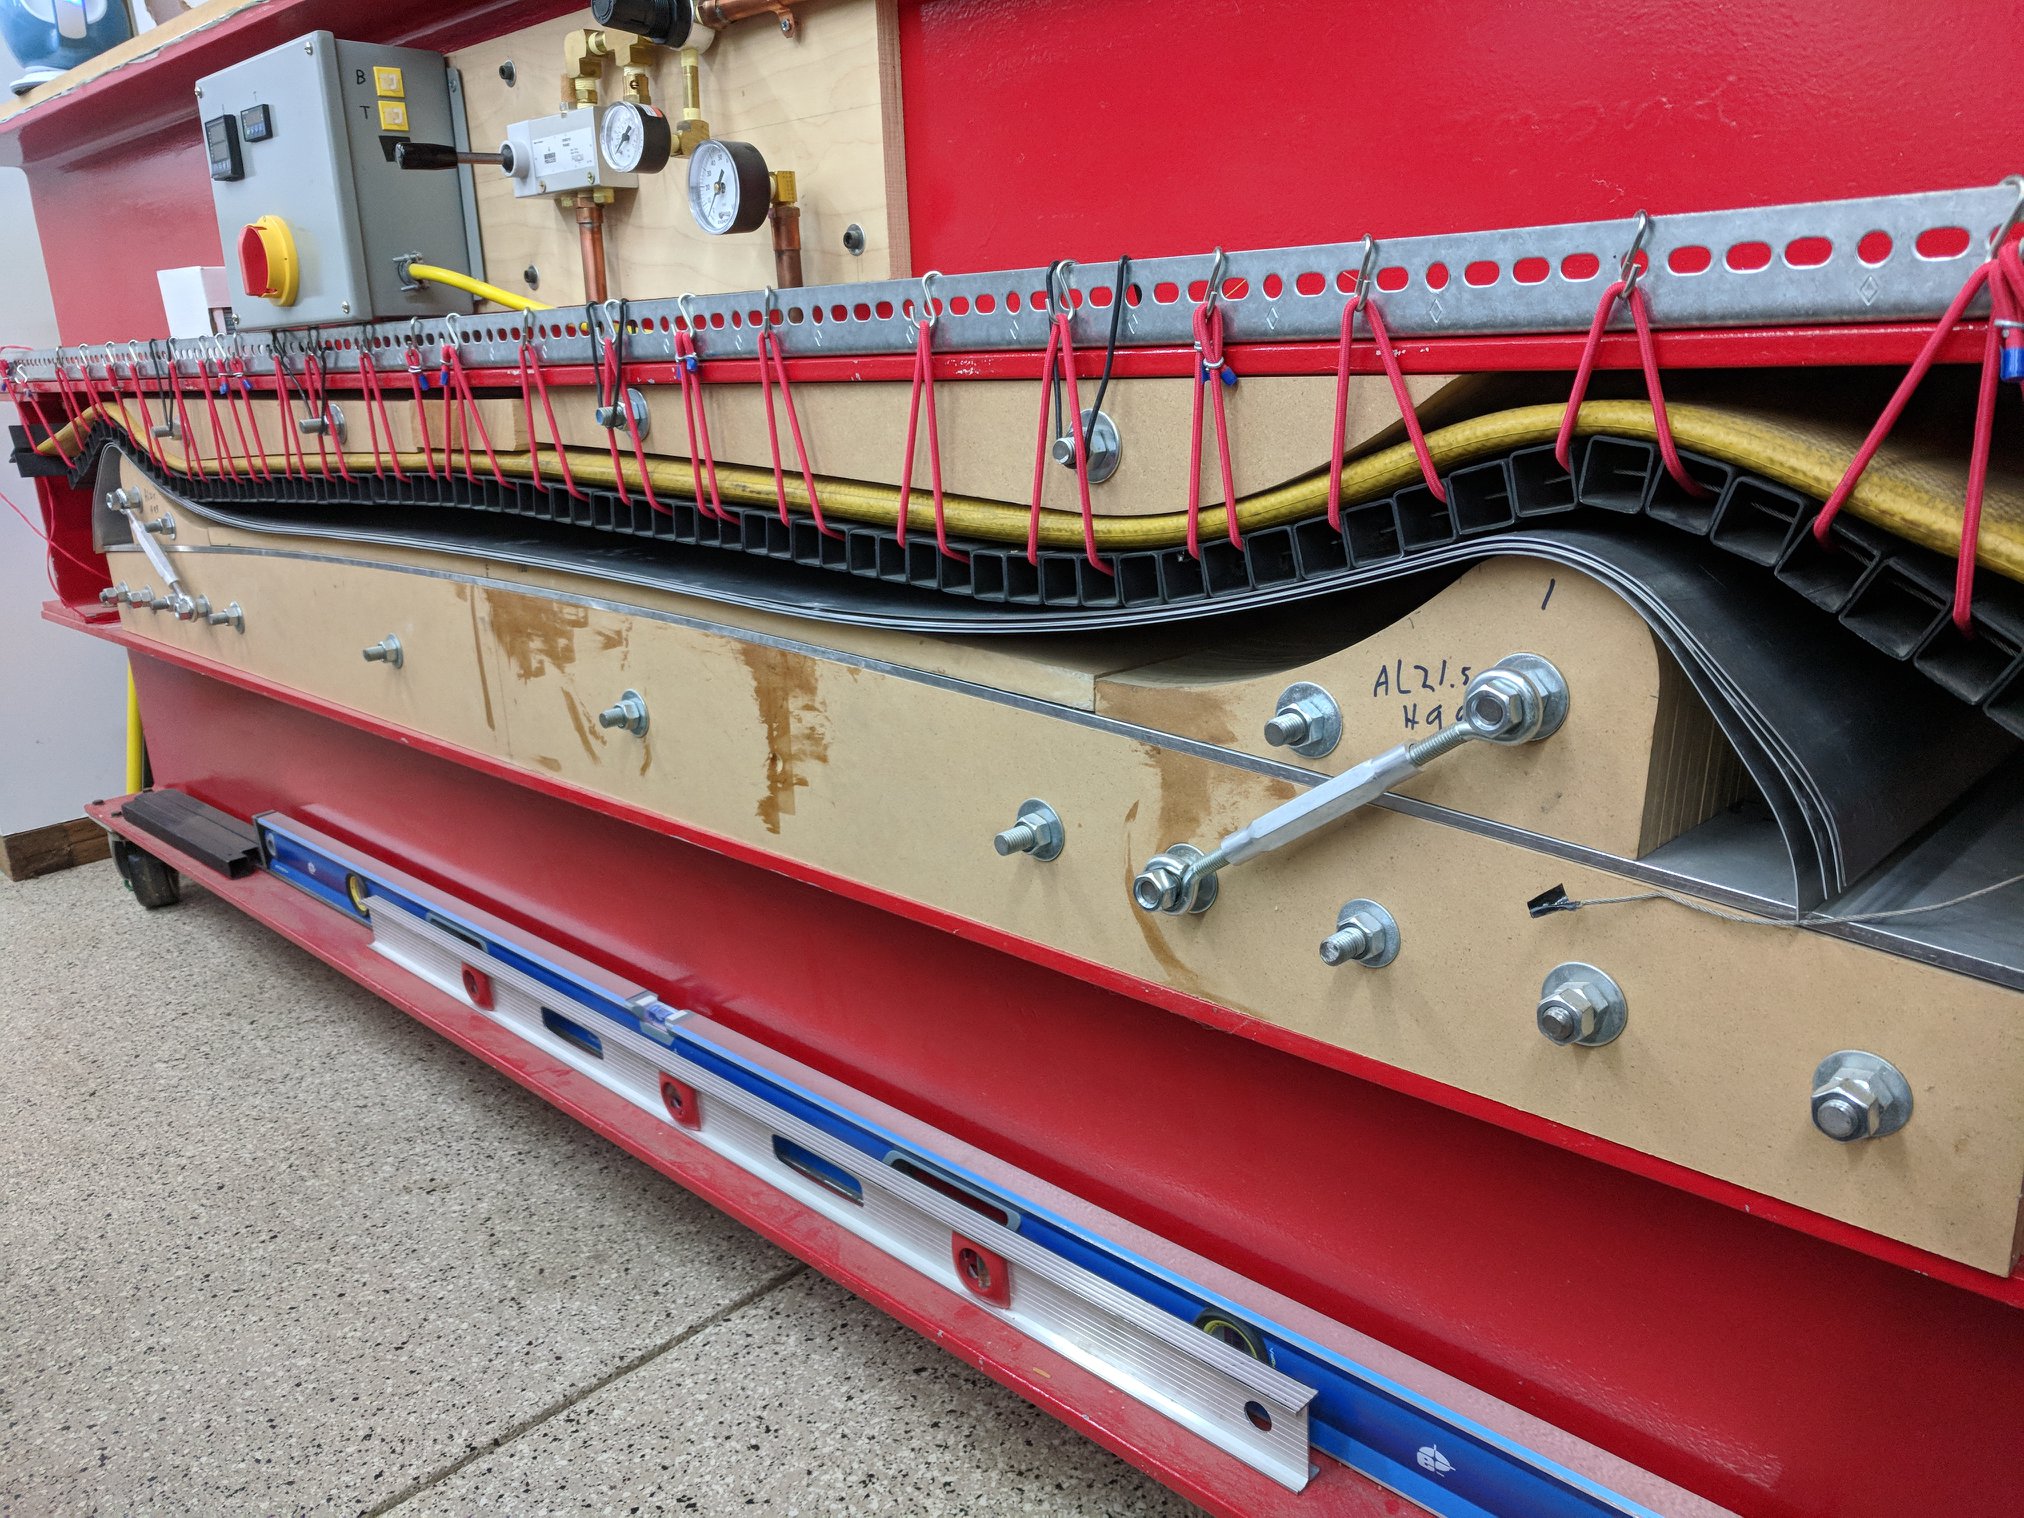
Molds for Pneumatic Presses #

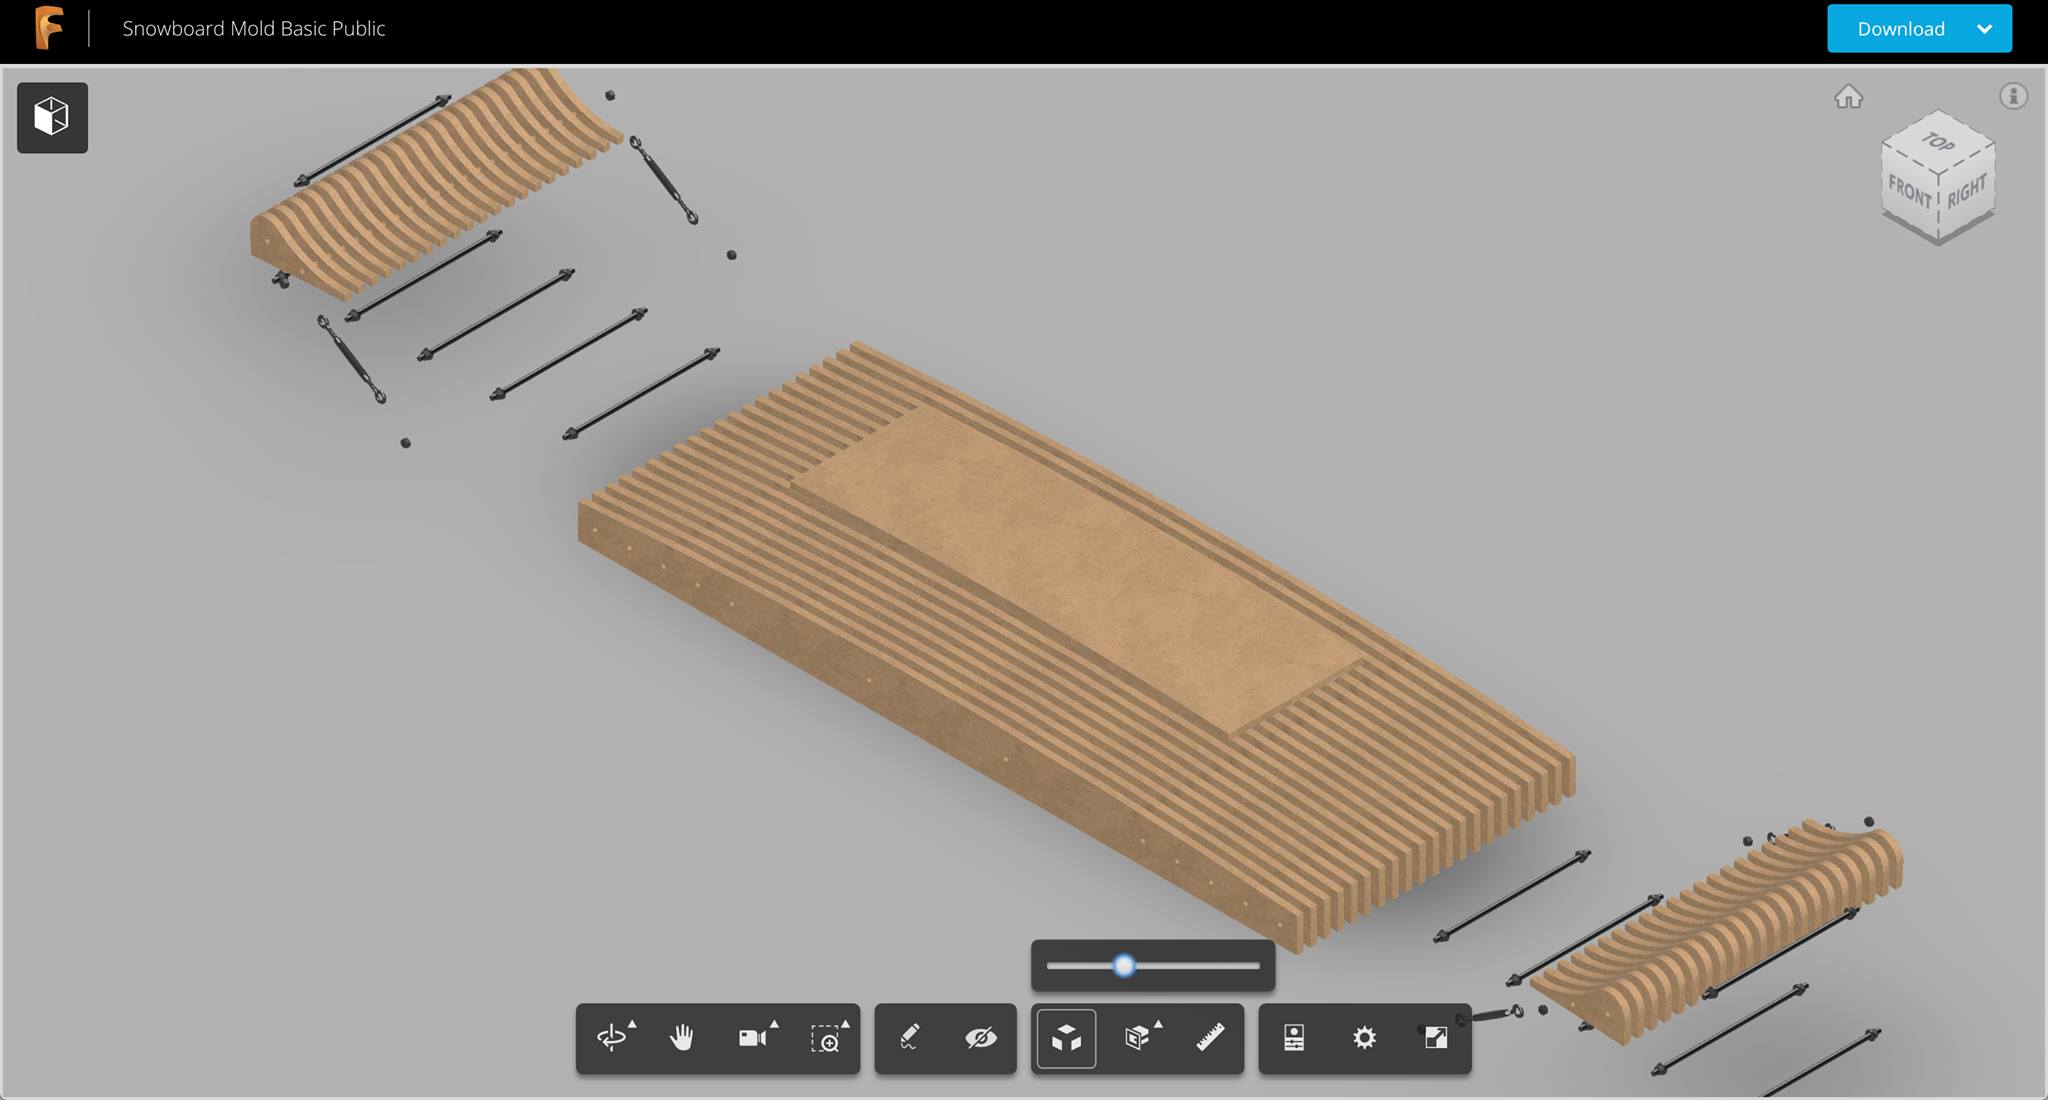
I’ve been doing more with Fusion 360, and in preparation for making some new molds I went ahead and modeled my current mold in full detail.
- The full mold model: https://a360.co/2qOt95B (view only)
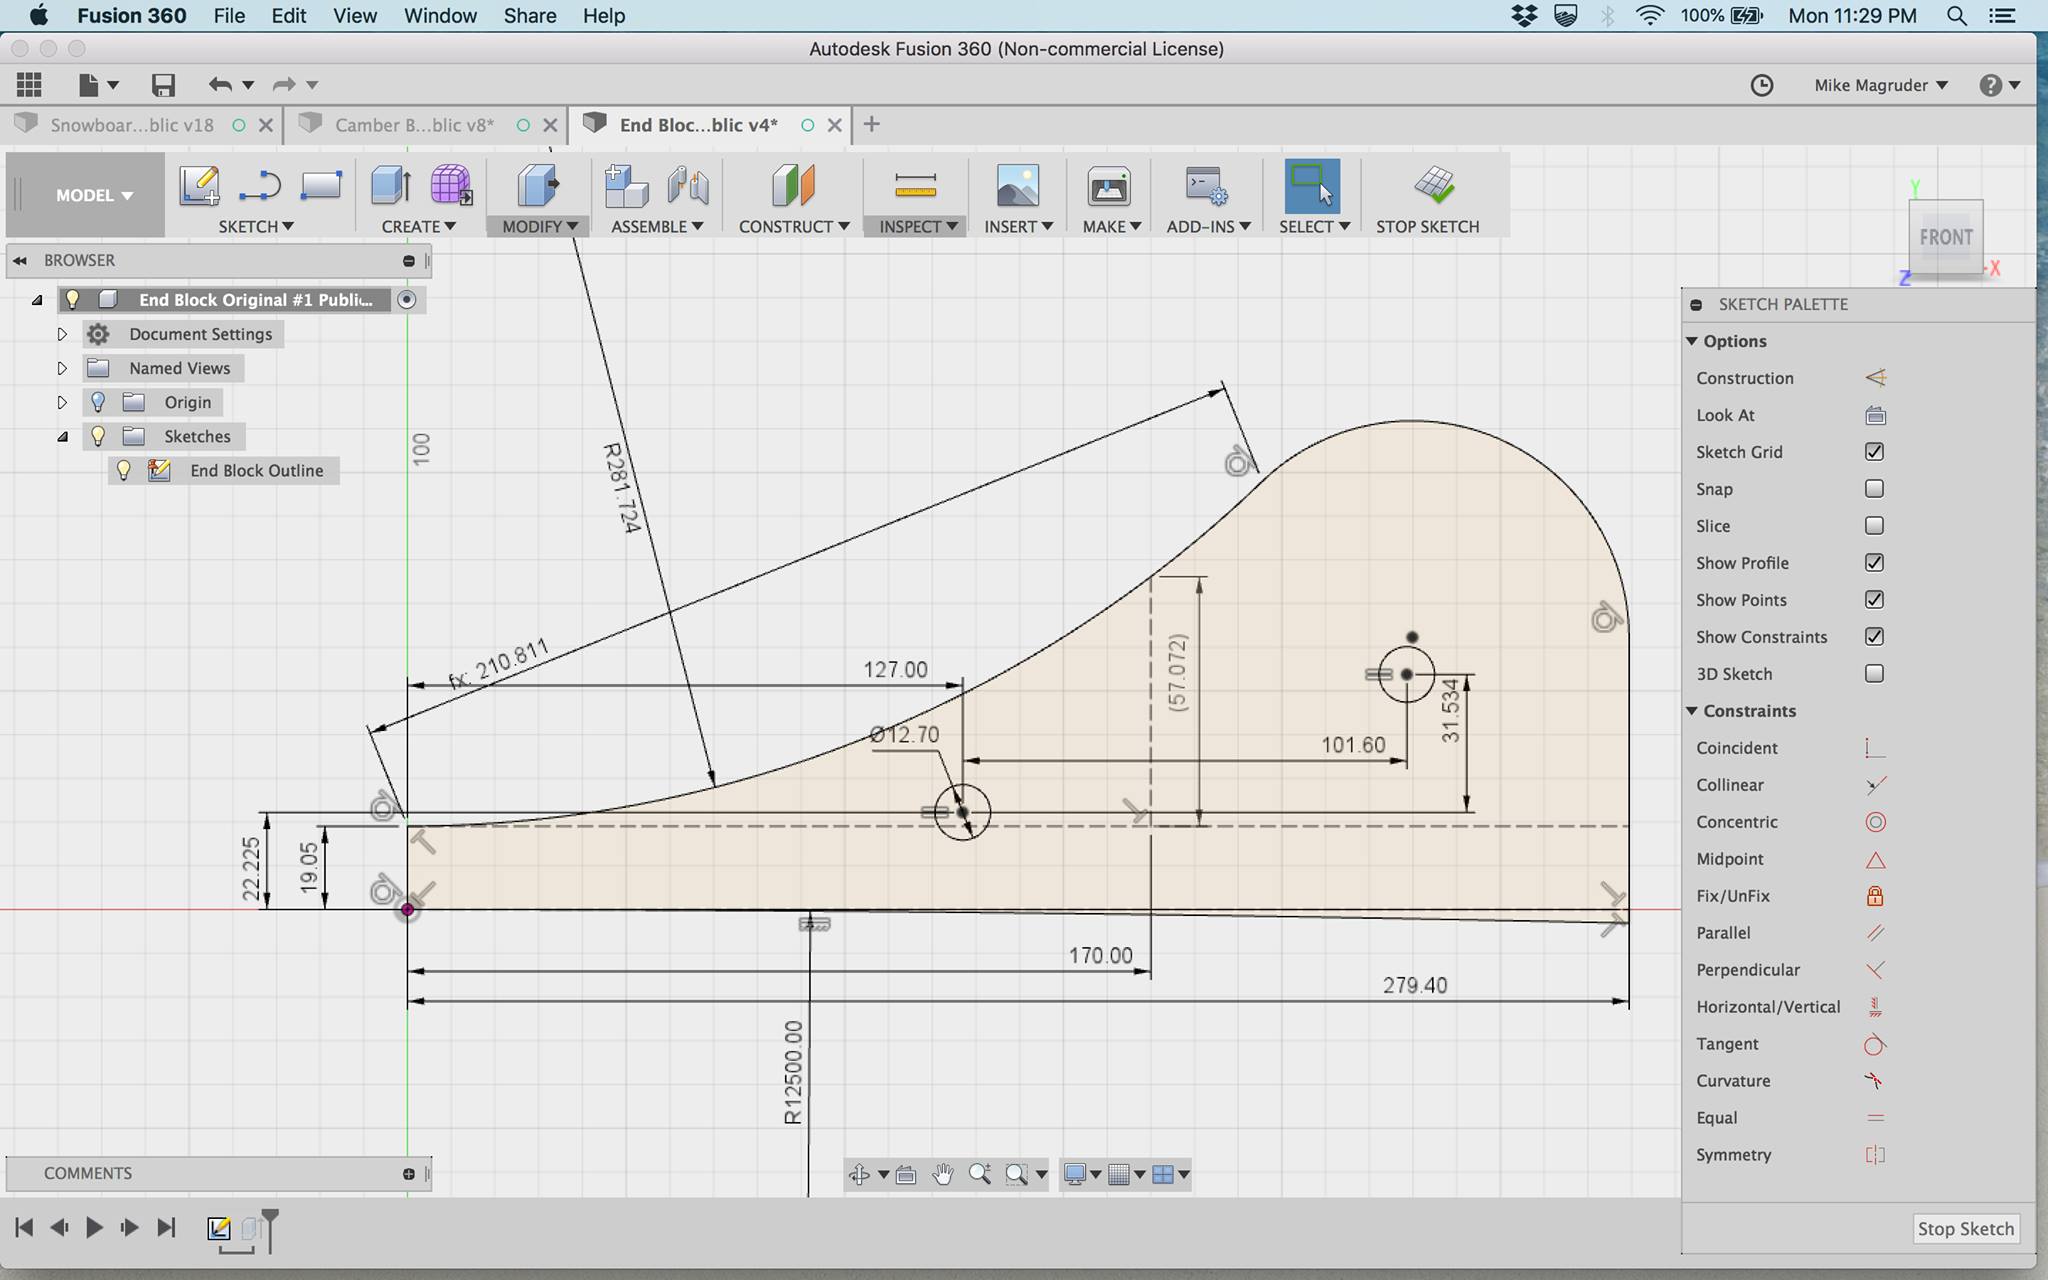
- The end block model: https://a360.co/2HPniGG (view only)
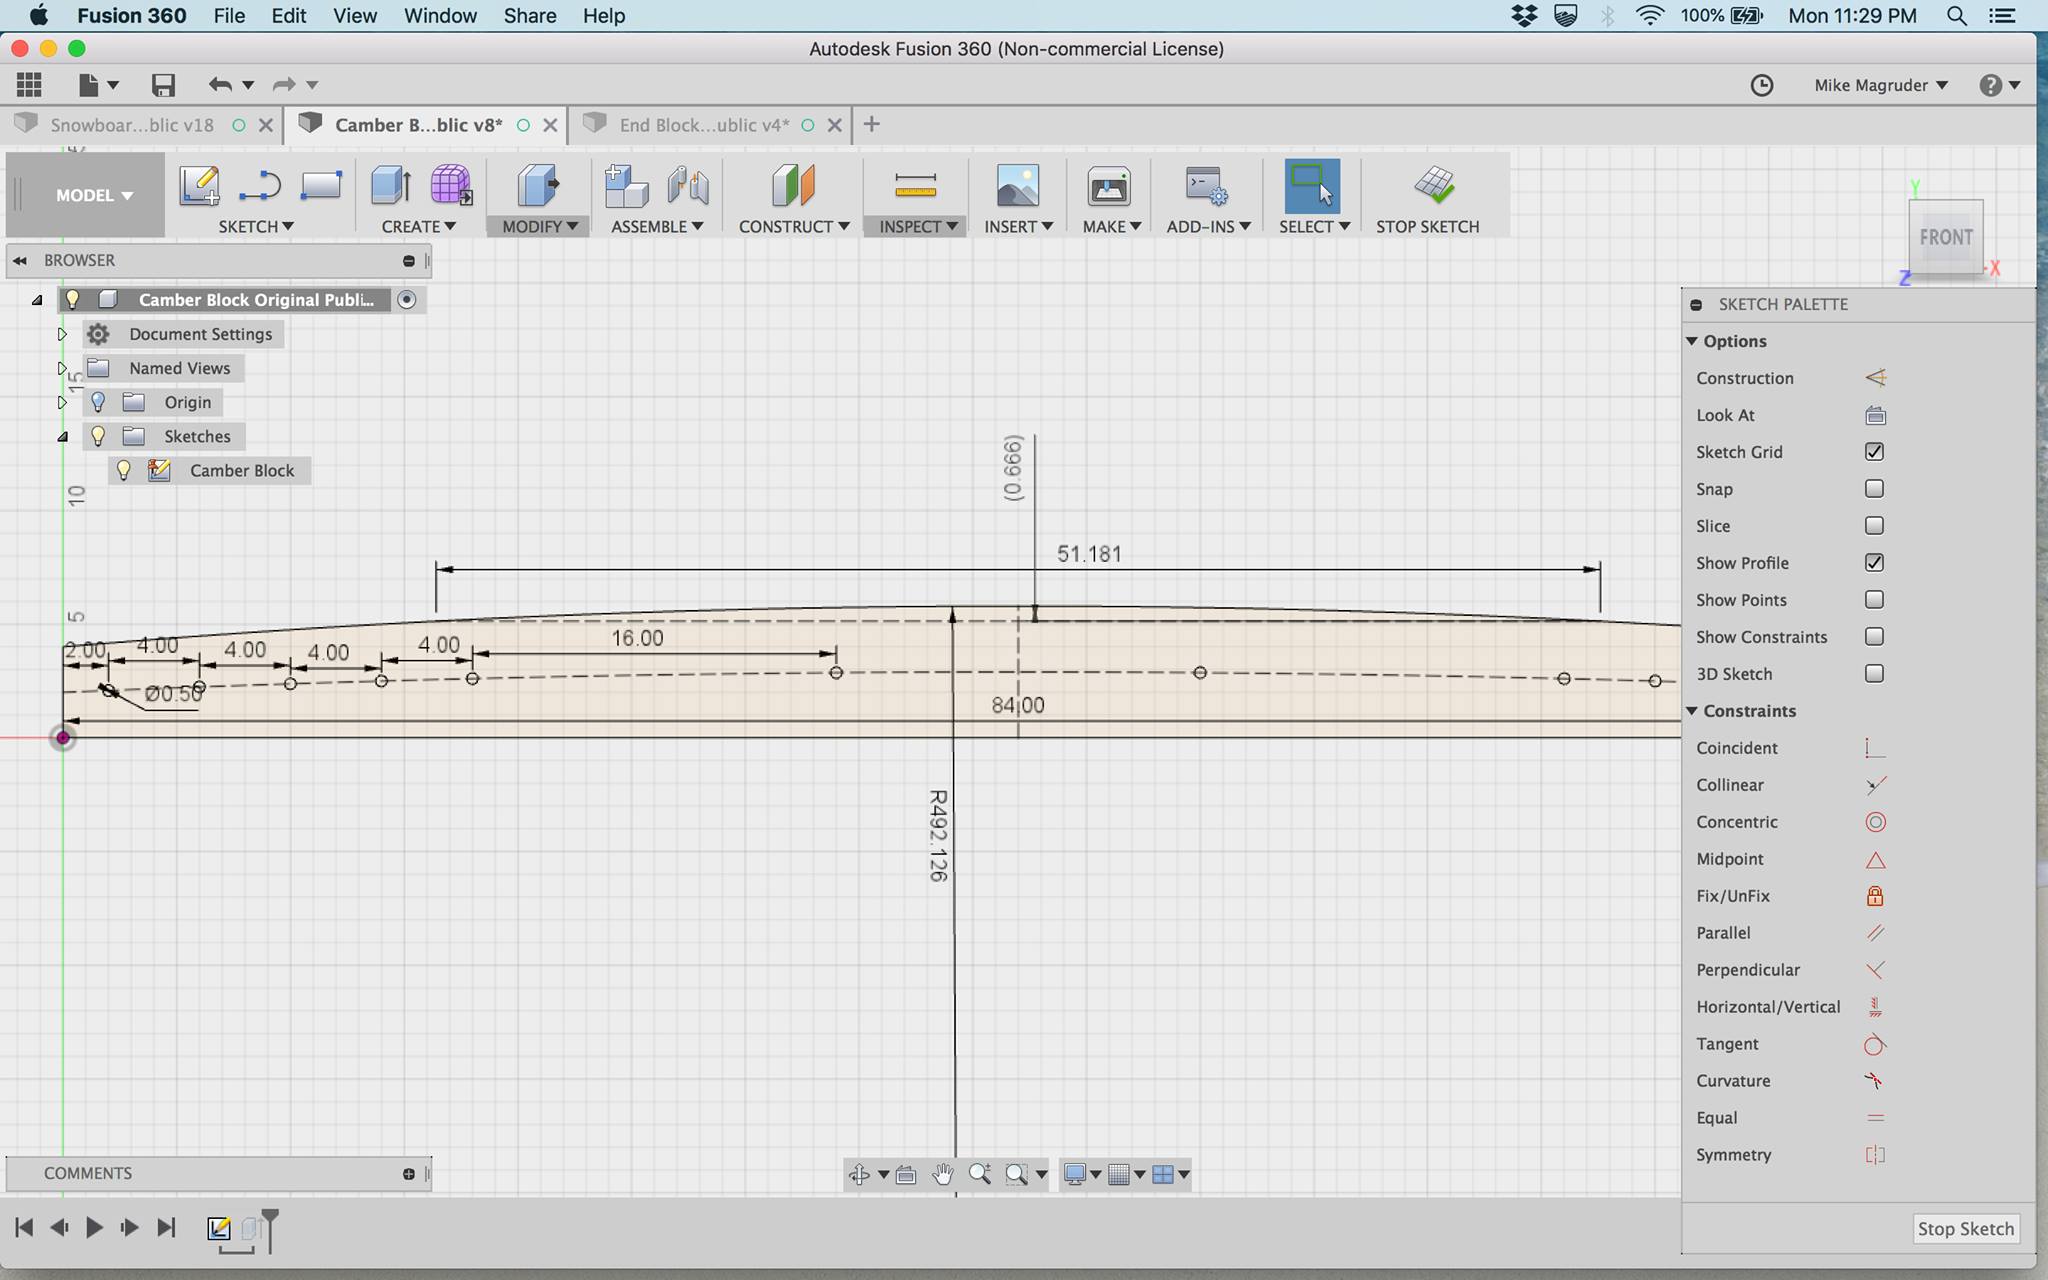
- The camber block model: https://a360.co/2qUJSEc (view only)
If you follow each link you’ll get a 3D model you can play with a bit in your web browser. Try the Explode Model button on the full mold model just for fun. This will all work from your phone, too.
Downloadable model files:
- Snowboard_Mold_Basic_Public_v18.f3z
- Snowboard_Mold_Basic_Public_v18.step
- End_Block_Original_1_Public_v4.f3d
- End_Block_Original_1_Public_v4.step
- Camber_Block_Original_Public_v8.f3d
- Camber_Block_Original_Public_v8.step
If you’re a Fusion 360 user, you’ll find that the sketches for the end blocks and camber blocks are fully constrained and parametric. Hit Modify -> Change Parameters to see the major parameters I used to define these. If you tweak them the models will update correctly.
The point of this mold design was to be adjustable and work reasonably well for a wide variety of boards. I change the center plate based on the effective edge of the board, and I have a few different nose/tail blocks with different amounts of kick. I often use the same nose block for different length noses which yields a bit more kick for a longer nose.